The purpose of working in a studio is control. This includes lighting for the most flattering result to go along with makeup, hair styling and camera angle. A photograph that has all of these advantages still has the finishing done in post-production. In the days of film and making prints, it was common to use darkroom techniques to lighten and darken areas of the print. For the most special subjects, the print would be airbrushed (why the term seems synonymous today with Photoshop) then re-photographed and printed for delivery to the customer.
Techniques for finishing a portrait
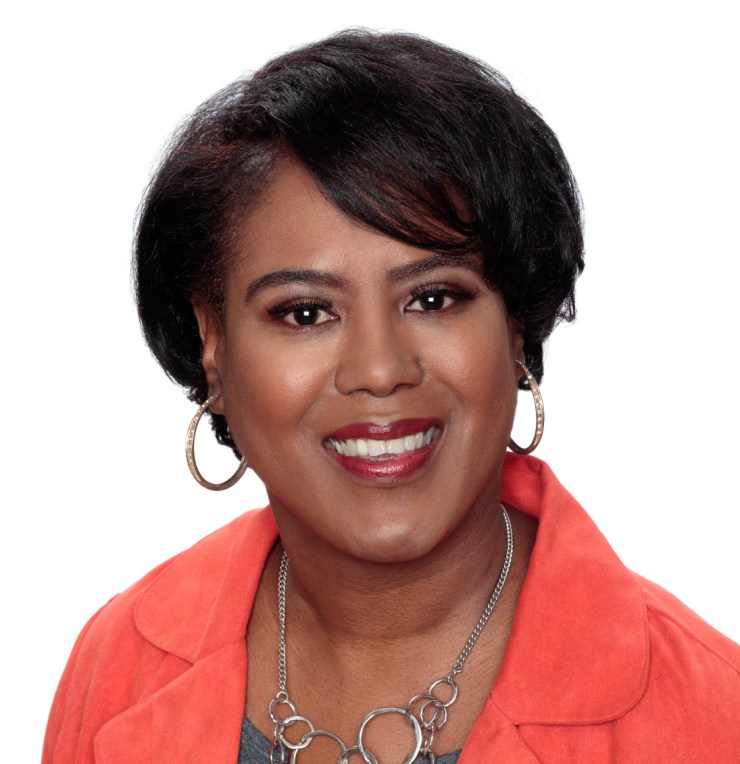
When I have a studio photograph that has been made with all of the skill of light and on-set technique I can bring to it, it’s time to go into the finishing stage.
Assessment
My first step is to look carefully at the photograph. This scrutiny shows me what I believe I want to enhance or downplay. Then, I create a new layer in Photoshop, and get the Pencil with a 4 to 6-pixel brush. I draw around the areas where I want to work. Arrows indicate a move using the Liquify filter. Once the retouching is done, I hide and show the guide layer. If the areas inside the green circles change, the work has been done.
.mgl-tiles { display: none; } #mgl-gallery-634eb13582bc1 { margin: -5px; width: calc(100% + 10px); } #mgl-gallery-634eb13582bc1 .mgl-box { padding: 5px; } @media screen and (max-width: 768px) { #mgl-gallery-634eb13582bc1 { margin: -5px; width: calc(100% + 10px); } #mgl-gallery-634eb13582bc1 .mgl-box { padding: 5px; } } @media screen and (max-width: 460px) { #mgl-gallery-634eb13582bc1 { margin: -5px; width: calc(100% + 10px); } #mgl-gallery-634eb13582bc1 .mgl-box { padding: 5px; } }
Studio portrait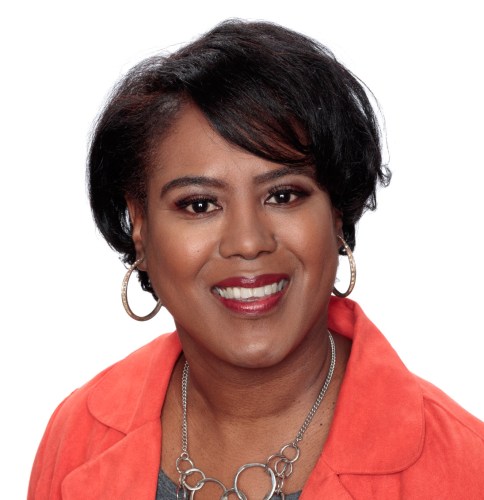
Retouching guide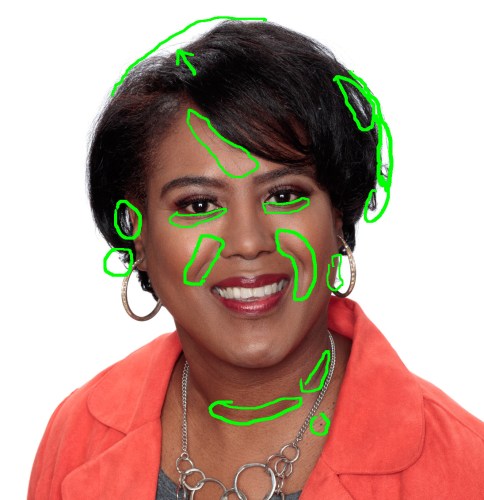
Liquify filter
The very first move I make in a retouch is to use the Liquify filter. In this case, the top of the subject’s hair is flat. Liquify is great for making the hair look more full.
Retouching
Working on her hair, I use the Clone Stamp tool to fill in the gaps in her hair. In photos where the background is completely evenly lit without a pattern, I clone the background over the flyaway hairs with a 50% hard brush. Next, I use the Spot Healing brush to clean up blemishes, and lines on her neck and to soften the parenthesis below her nose and above her lips.
Tip: Use one stroke on each of these dark lines. Choose Edit > Fade Healing Brush … Set the opacity to 50% then click OK. This softens the line without taking it out completely.
Finally, I use the same technique on the lines under her eyes. The Spot Healing brush is perfect for removing flyaway hair on her forehead.
.mgl-tiles { display: none; } #mgl-gallery-634eb1358340f { margin: -5px; width: calc(100% + 10px); } #mgl-gallery-634eb1358340f .mgl-box { padding: 5px; } @media screen and (max-width: 768px) { #mgl-gallery-634eb1358340f { margin: -5px; width: calc(100% + 10px); } #mgl-gallery-634eb1358340f .mgl-box { padding: 5px; } } @media screen and (max-width: 460px) { #mgl-gallery-634eb1358340f { margin: -5px; width: calc(100% + 10px); } #mgl-gallery-634eb1358340f .mgl-box { padding: 5px; } }
Before retouching
After retouching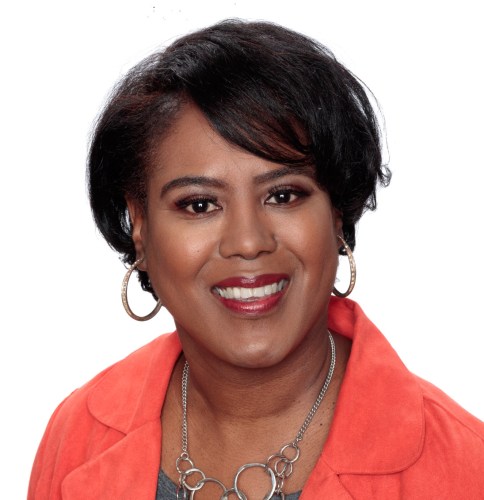
The finishing touch — Perfectly Clear
This is my favorite finishing tool for studio portraits. My secret is the skin enhancements available in Perfectly Clear Complete. Here are the ones I use step-by-step.
Light Diffusion
My very favorite part of Perfectly Clear’s skin enhancements is Light Diffusion. Found under the Tone section, Light Diffusion is the last option. I handle this section’s other options at the camera. The exposure is settled with my Illuminati meter. The depth is satisfied with contrast control while my makeup artist takes care of the skin and depth bias. Nothing and I do mean nothing adds as much as some of the magical Light Diffusion. Usually, this control is somewhere north of 50.

Face Detection
This one is for eye enhancement. Tick the Show & Adjust Contol Points box then drag the yellow dots over the pupils of the subject’s eyes. Hide the yellow bits by unchecking the box. This sets up the rest of the eye enhancements.
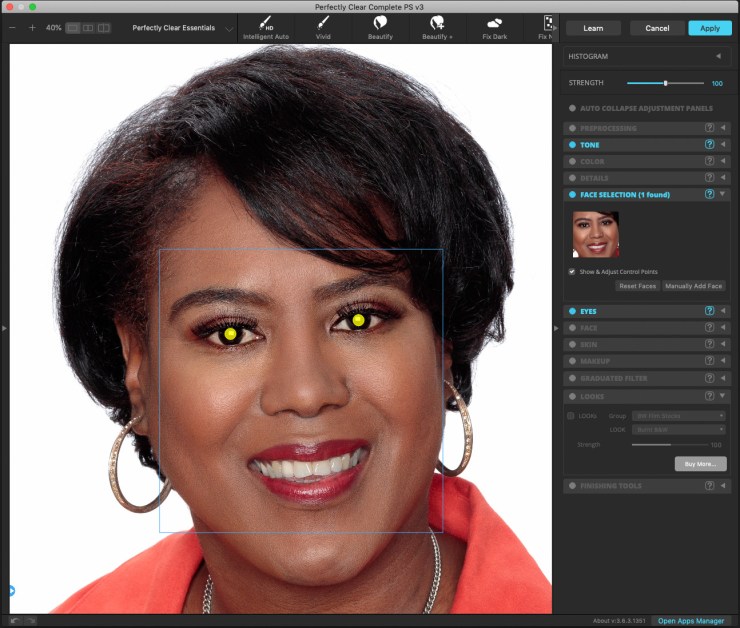
Eye enhancements
This one is a subtle change. The Eye Enhance control kicks in a bit of brightness into the eyes. Dark Circles adds some lightening under the eyes. Nice!

Skin smoothing
Perfectly Clear has some great skin-enhancing tools. I love them as long as I apply them sparingly. Here face detection helps a lot. I add a very small amount of skin smoothing, more Infrared Removal and the smallest amount of Shine Removal. Lighting and makeup take care of almost all of the shine on set. There has to be some shine on the cheeks, the nose and the chin to help show their roundness. Without it, the face would look flat.

Adding the Perfectly Clear enhancements
Before calling the Perfectly Clear Complete filter (Filter > Athentech Imaging > Perfectly Clear …) I duplicate the layer I’ve retouched in Photoshop. Then I apply the Perfectly Clear filter to that layer. I hold down the Option key (Win: Alt) and click the new layer mask icon at the bottom of the layers panel. I use the brush tool, painting with white to reveal the Perfectly Clear enhanced layer areas over her face. And that’s it! The finished studio portrait is ready for the client to use on her website, and social media, and of course for print on business cards and to frame for her family.

Tell your story with the second annual Visual Storytelling Conference!
Experience four days of interactive, online training sessions featuring a range of educational content with experienced photographers and content creators. This free event kicks off with a series of technical boot camps to build essential skills, followed by live, online sessions on photography, video, business and social media. Join live from March 10-13, 2022!
