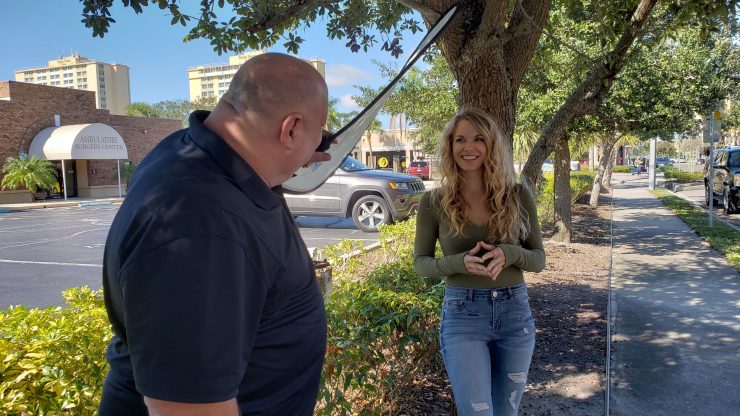
Removing harsh, ugly shadows from what would be a beautiful portrait is relativity easy. You find a shaded area, set your camera to a low aperture of f/2.8, diffuser the light and then let Mother Nature’s light do the rest. It really is that easy. Here are the steps in more detail on how to remove harsh shadows using natural light.
Find a shaded area
Look for a close shade treetop canopy or an open shade area — a building or an object blocking direct sunlight — to remove your subject from direct sunlight. This solves the problem of harsh light hitting the subject but shade also causes a bluish tint to an image. Adjusting your camera’s white balance, using a White Balance Reference Card or adjusting the white balance in post-processing will quickly fix this problem.

Soften and balance the light with a diffuser
Although I moved the subject under a tree, dapples of light shined through and cause unflattering shadows on the subject’s face. Adjust the subject the best you can to remove as many unwanted shadows as you can, then soften and balance the light with a diffuser. This will convert the quantity of light to a better quality of light.
It’s also worth mentioning, that light takes on the color it bounces off of or shines through. If the tree is covered with thick green leaves, a greenish tint will spill onto the subject. If this happens, you may want to look for another area or remember to fix it in post-processing.
.mgl-tiles { display: none; } #mgl-gallery-634eb6d1e3c2e { margin: -5px; width: calc(100% + 10px); } #mgl-gallery-634eb6d1e3c2e .mgl-box { padding: 5px; } @media screen and (max-width: 768px) { #mgl-gallery-634eb6d1e3c2e { margin: -5px; width: calc(100% + 10px); } #mgl-gallery-634eb6d1e3c2e .mgl-box { padding: 5px; } } @media screen and (max-width: 460px) { #mgl-gallery-634eb6d1e3c2e { margin: -5px; width: calc(100% + 10px); } #mgl-gallery-634eb6d1e3c2e .mgl-box { padding: 5px; } }


Search for pockets of shadows
Sometimes you may not have room for a diffuser to soften the light. If this is the case, try your best to look for pockets of shadows. Place your subject in this area knowing you have to adjust the shadows in post. If you have to get it perfect in camera, you may have to overexpose the image a little causing the subject to look good but risk a blown-out background. Weigh your options to determine which one would be more efficient.


These steps sound simple, don’t they? Commit them to memory — or save them as a note on your phone — then take a test subject out and practice. Soon, they will become second nature and you will spend more time being creative and less time thinking technical.
Tell your story with the second annual Visual Storytelling Conference!
Experience four days of interactive, online training sessions featuring a range of educational content with experienced photographers and content creators. This free event kicks off with a series of technical boot camps to build essential skills, followed by live, online sessions on photography, video, business and social media. Join live from March 10-13, 2022!
