
I’m a collector of quotes and share them when I speak to groups. Someone asked me if I had fashioned any quotes myself. Here’s one: “Don’t look at what a subject is, but what it might become.” By Bob Coates. Hence the article today on enhancing an image.
Oleander

The oleander is a poisonous plant that produces quite lovely blossoms. I’ve found nature can use a hand when creating macro images. When photographing close details, slight imperfections as well as the beauty becomes magnified. So it’s time to clean up and enhance the subject.
Capture
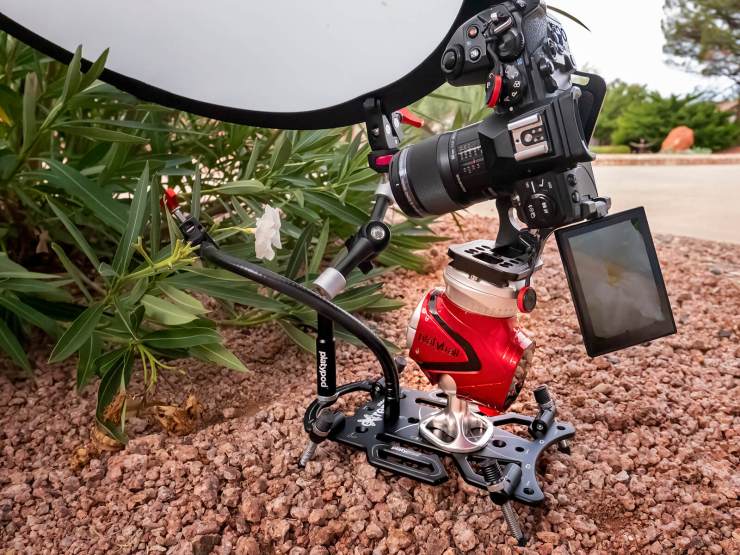
You need to get in close and especially when photographing outdoors, it’s good to have some extra “hands.”
In this instance, I used some of my Platypod gear to hold the bloom in place and hold a scrim to control contrast and spread the light. As a Platypod Ambassador, I get to try out all the new gear such as the Platypod Elbow.
Post-production
A quick run of the RAW file through Adobe Camera Raw gives the base with which to work. Setting color, opening shadows and taming highlights were completed.
Then I opened the image as a layer in Photoshop, and the process of enhancement began. The layer was duplicated and using the Camera Raw filter and masks, and some selective tweaks were done. Specific sharpening also completed.
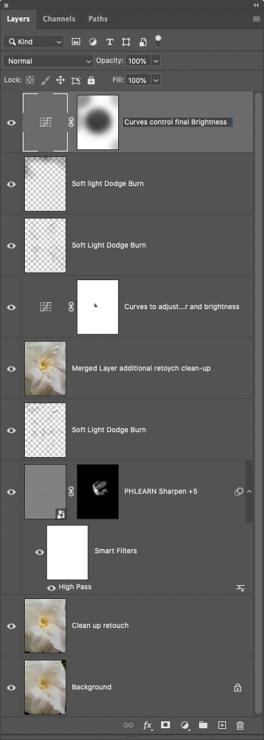
Using the Spot Healing Brush tool and the Clone Stamp tool, small imperfections were cleaned up. Three different Soft Light layers were used. I find that if you gently add shadows and highlights rather than trying to do it all in one go, helps to deliver more pleasing results.
When you paint on a Soft Light layer with either black or white and a soft edged, low opacity brush, you add shadow and highlight to the image. Shadows create form and depth in the image.

Final color and tone were handled using Curves Adjustment layers. Adjustment layers allow you to close the file, save as a Photoshop Document and reopen for changes if necessary without losing file fidelity.
Yours in Creative Photography, Bob
Tell your story with the second annual Visual Storytelling Conference!
Experience four days of interactive, online training sessions featuring a range of educational content with experienced photographers and content creators. This free event kicks off with a series of technical boot camps to build essential skills, followed by live, online sessions on photography, video, business and social media. Join live from March 10-13, 2022!