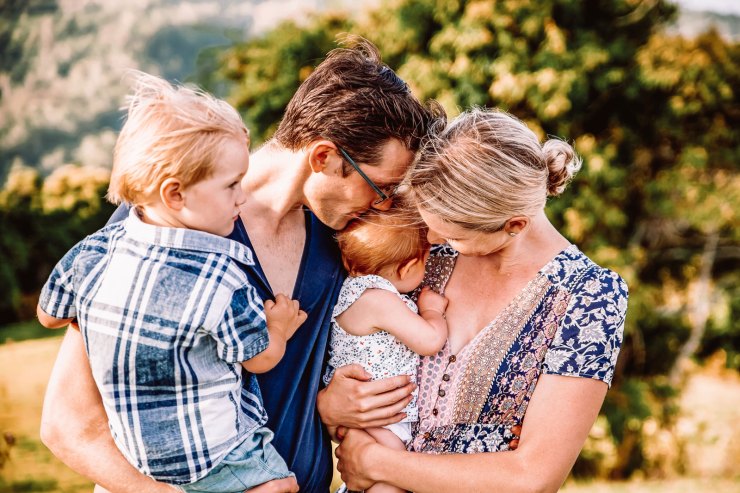
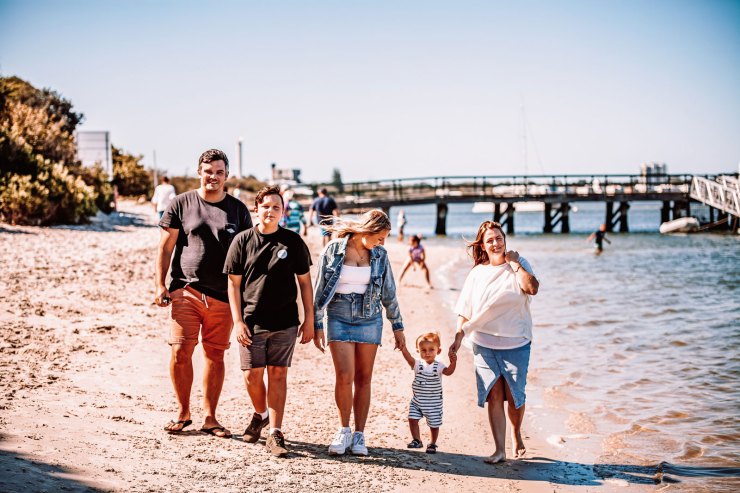
When planning a lifestyle family photoshoot, I always consider the light and location first. Outfits, props and the prompts I will use are all important, but it’s harder to make awful light work than it is to downplay a gaudy T-shirt.
Here are some tips to help you choose a location with beautiful light for your clients — or your own family photos.
The time of day determines the light
No matter where you are, the time you choose will determine the quality of light you have to work with. Golden hour, named for the beautiful, soft light during this time, happens after dawn and before sunset. It’s an ideal time of day to capture flattering family photos. Don’t let the name fool you, though — it can be longer or shorter than an hour, depending on where you are and what season it is.
As a general rule, when the shadow of an object is longer on the ground than the object is high, you can count on the light being soft and flattering. In other words, if you are six feet tall, but your shadow stretches seven feet along the ground, then you’re in the safe zone for soft light.
To estimate your golden hour window, start by checking the time of sunset. Do a Google search like, “Sunset on Dec. 3 in Brisbane.” Golden hour starts 2 to 1.5 hours before that time and the soft golden light will persist until about 10 to 15 minutes before sunset. As the sun sinks to the horizon, it can become dark quickly as you enter blue hour, which is perfect for dark and moody photos and silhouettes against the colored sky.

For a dawn golden hour shoot, understand first that the dripping-honey glow of sunset is not the same as golden hour light at sunrise. Dawn light is cooler (in color temperature), and the softness doesn’t last as long. You’ll have to work faster in the morning to capture what you need before the sun gets too harsh. At daybreak, you have a blue hour window of predawn light, then golden hour for 30 minutes to an hour after sunrise.
The location also affects the light
If the timing is critical, scout the location in the days leading up to the shoot, to check the lay of the land. The sun “sets” in a valley a lot earlier than sunset. On a hillside facing west, you’ll have a long luxurious sunset; on one facing east, you’ll be in the full shade before the sun sets.
At the beach, on a mountain top, in rolling fields or an expansive open garden, you can probably count on the sun setting when you expect it to. In a forest or urban setting, there will be more shadows to contend with.
What about shooting at midday?
If you’re forced (by toddler nap times or a busy family schedule) to have your photoshoot in the middle of the day, you need to be prepared to cope with harsh light and shadows. You’ll be up against squinting eyes, strong contrast and blown-out skies. There are a few simple ways to cope with this and still achieve pleasing light.
Find some shade
First, find some open shade at your location. Open shade is found at the edge of a shadow. For example, underneath a big shady tree, have your clients stand at the edge of the shade, so that their bodies and faces are completely in the shade; sunshine is still reflecting in and will light their faces.
Compare this to the deep shade right next to the trunk: The shadows here are darker and there is less sunlight reaching the depths. Open shade is much more flattering than direct sunlight and provides much more light than deep shade.

The great indoors
Move inside and, ideally, use window light as your light source. Turn off all the artificial lights inside if you can. If you can’t, try to have only one temperature of light. For example, switch off fluorescent lights and use only incandescent lights to eliminate as many weird color casts in your photos as possible.
Another excellent option in a dark space is to boost with an on-camera or off-camera flash. Bounce the flash off the wall behind or beside you (not the roof), and the wall will act as a giant softbox to create soft light on your subjects. I always prefer adding flash rather than relying on whatever lighting is in the home, because I know the color temperature of the flash will be consistent (and attractive).

Get creative
If you have to shoot outside in direct sunlight, treat it creatively. Silhouettes, rim lighting and sun flares are all beautiful to add to a family photoshoot, and high-contrast sunny shots give a clear feeling of beach days and summer fun.
Shoot in RAW and watch your camera’s overexposure warning to make sure you aren’t blowing out skin, then pull shadows up and highlights down later in post to recover color and detail. Let the sky blow out to save skin tones, if necessary.

With planning comes beauty
I often use a golden hour app when planning a shoot: The better ones can help you avoid physically visiting the location (with a compass!) by showing the sun’s path on different days of the year. My favorite is Golden Hour, available for free on the Google Play Store. With a bit of cartographic literacy and 3D imagination, you can use an app like this to estimate what the light will be like for your shoot. As with any project, controlling what you can to get the best result in-camera is always preferable to a lot of time-consuming editing in post.
Tell your story with the second annual Visual Storytelling Conference!
Experience four days of interactive, online training sessions featuring a range of educational content with experienced photographers and content creators. This free event kicks off with a series of technical boot camps to build essential skills, followed by live, online sessions on photography, video, business and social media. Join live from March 10-13, 2022!
