Exposure can be really confusing. It’s particularly so with modern digital cameras. Why? The type of light meters built into cameras is a big reason. Those meters are reflective meters. They measure the amount of light bouncing off the subject. A reflective meter’s exposure makes whatever it sees 12.5% gray. Always.

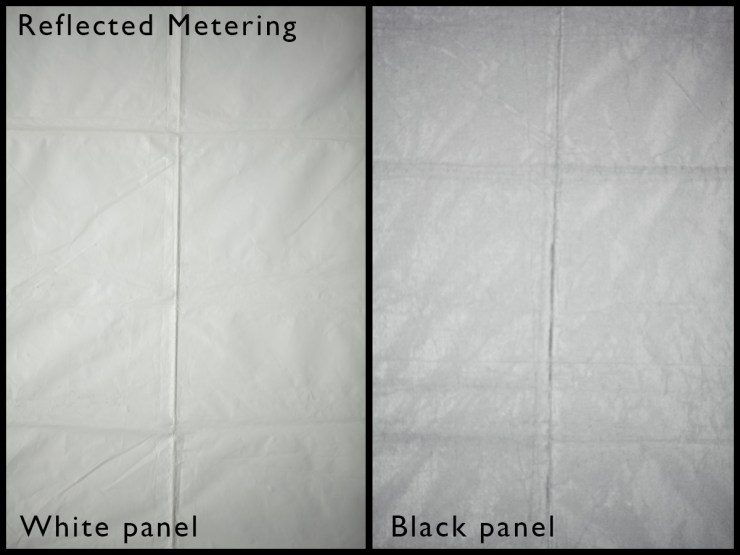
Here’s an easy experiment that shows how they work. Take a white card and a black card outside on a sunny day. Put your camera on P (for Professional — er, no, that’s actually Program mode.) Set the camera on the spot metering. Put the white balance on Daylight or Sunny. Fill the viewfinder with the white card then take a picture. Put the black card over the white card, again fill the frame with the black card and make the photo. You have a photo of a white card and a black card right? Well … check your camera’s monitor.
What do you see? That’s right, two almost identical gray cards. What’s happening here? Well, the reflective meter returns exposure settings to make whatever you aim it at turn out 12.5% gray.
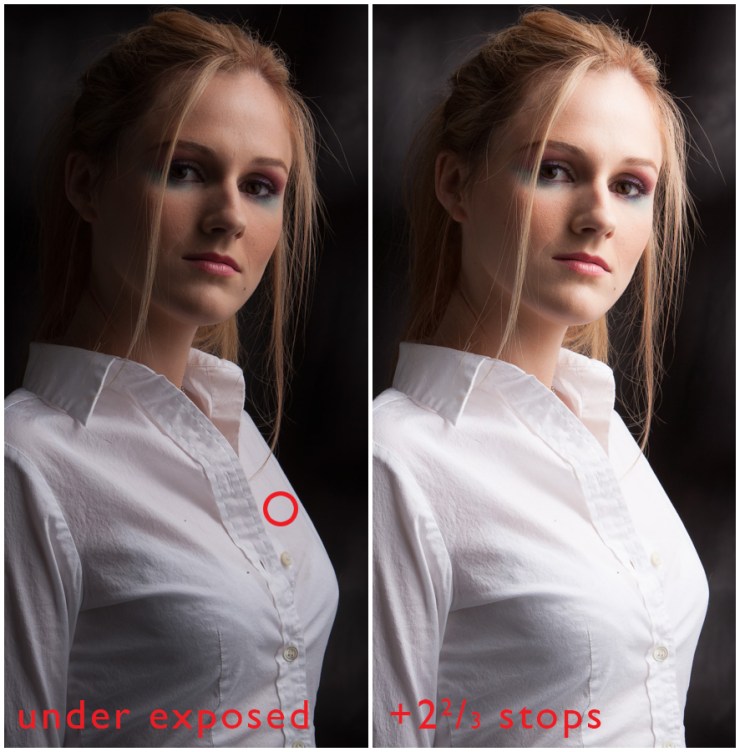
When shooting someone in a white shirt (or a bridal gown) this is a problem. Huge. The photo will be underexposed by more than two stops. Not a good thing.
Here’s an example. The red circle (in the figure below) is the spot reading point. The model’s blouse is gray as predicted. For the image on the right, I added 2 and 2/3rds f/stops of light to get that blouse white with detail. Everything looks much better with the right amount of light.

The right amount of light
Where does that “right amount of light” become the “right amount?” Guesswork. Nope. It’s really quite simple. Sort of.

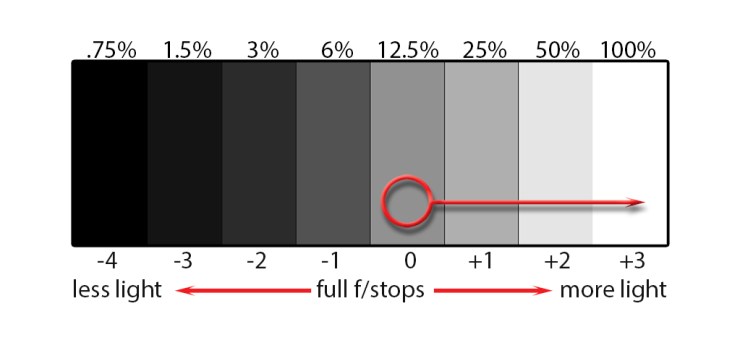
Start with the reflective meter. It gives an exposure that makes whatever it sees 12.5% gray. The “correct” exposure wants to be a little less than 100% reflectance. 100% is white after all. The chart below shows the difference between what the meter says and what the exposure wants to be. Shifting the 12.5% reading to almost white now makes sense. Add one stop of light. The reflectance becomes 25% because a one-stop add is twice as much light. That doubles the reflectance. Add one more stop of light. The reflectance is now 50% since the amount of light has doubled again. The blouse has to have detail in it so another full stop is too much. Two-thirds of a stop more is just right pushing the reflectance to a little more than 80%. Perfect.
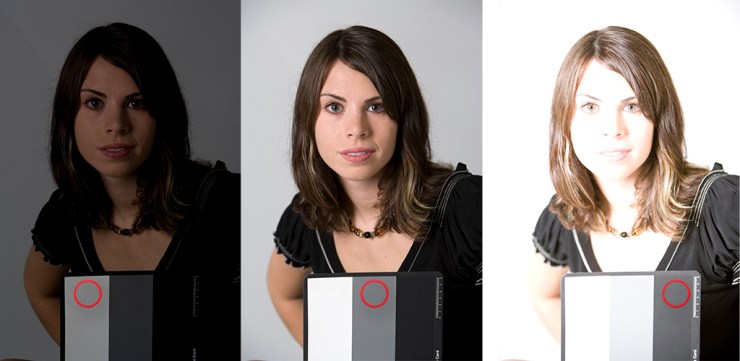
A reflected reading overexposes the black card. Its reflectance wants to be somewhere between 1.5% and 3% or two to three stops less exposure than the reflective reading. Here’s how reflective readings render a subject when reading a black card, a gray (12.5%) card and a white card. The results are, from left, underexposed, correctly exposed and overexposed. Notice that the areas in the red circle that were read with the spot meter are all 12.5% gray.

The reflectance chart can help unravel exposure issues. It helps interpret what the meter sees to what you actually want the photograph to be. It’s a good guide although not completely accurate.
There is another way. Next time let’s talk about incident light meters.
Tell your story with the second annual Visual Storytelling Conference!
Experience four days of interactive, online training sessions featuring a range of educational content with experienced photographers and content creators. This free event kicks off with a series of technical boot camps to build essential skills, followed by live, online sessions on photography, video, business and social media. Join live from March 10-13, 2022!
