How do we find the best dark skies? How do we plan for night photos with Milky Ways? I’ll discuss some sites that will help you in this quest.
It’s worth it, after all Night photography road trips are exciting. The long drives, strange music, late night taco stands, the fascinating conversations. And if you do a little bit of homework, you can take a good road trip and make it epic.
You don’t need to plan all your night sky endeavors to within an inch of its life either. Allow for fun, spontaneity, and exploration while still knowing that at a certain time at a certain place, you can create a photograph that will put a smile on your face.
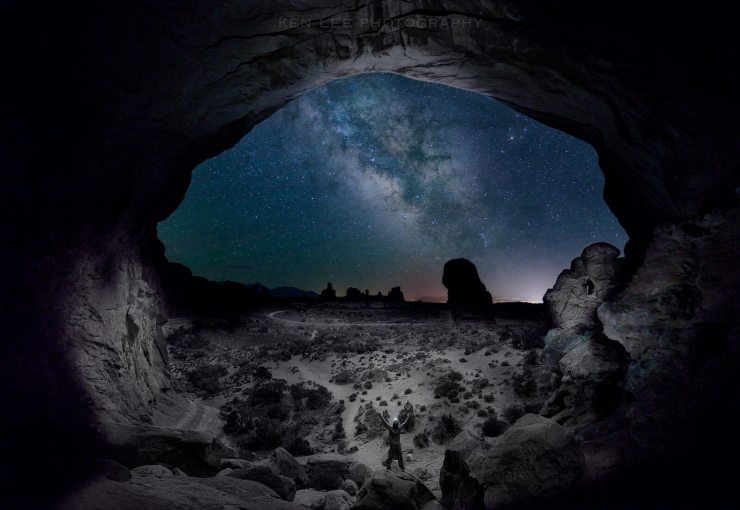
Let’s start with dark skies first.
According to National Geographic, 80 percent of the planet’s land areas — and 99 percent of the population of the United States and Europe — live under light-polluted skies that blot out the Milky Way. Naturally, the first order of business is to get away from light pollution.
But how do we do this? I’ll use an example of a photo I took in 2014 of the Delicate Arch in Arches National Park in Utah. At the end, you’ll see an example of how I planned for this.
Finding dark sky areas
A good first stop is the International Dark Sky Association. They encourage communities, parks and protected areas around the world to preserve and protect dark sites through responsible lighting policies and public education. They have a map that allows you to find many dark places around the globe.
Another useful site is Dark Site Finder. They also offer a useful tip, noting that it is difficult for many to get away completely from light pollution, but to consider photographing in areas where the sky is sufficiently dark in the desired direction. If you wish to photograph the core of the Milky Way, for example, you can look for places that are dark to the south.
Finding places of interest
Within these dark places, consider what makes a strong foreground. The most interesting night photos to me are usually ones that have strong subjects, providing context — a perfect marriage of earth and sky.
I would recommend doing a search in the dark sky areas, keeping notes about what seems appealing. This can be a lot of work, perhaps even more so if you want to photograph subjects that are original and relatively unknown. You can go down “rabbit holes” that consume hours of your time.
Google Maps
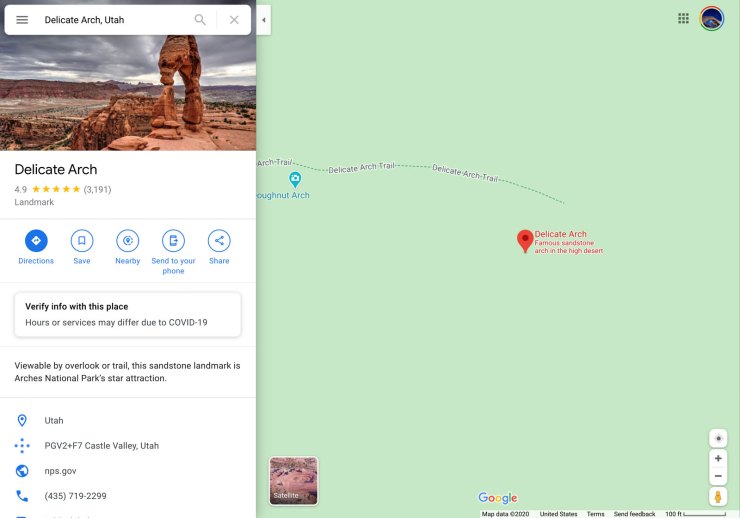
I often begin my searches by looking around the dark sky area chosen on Google Maps. Google Maps often points out the areas of interest. Sometimes, you may see a camera icon. Click on that and this often produces photos submitted by various Google users. This gives you an idea of what it looks like.
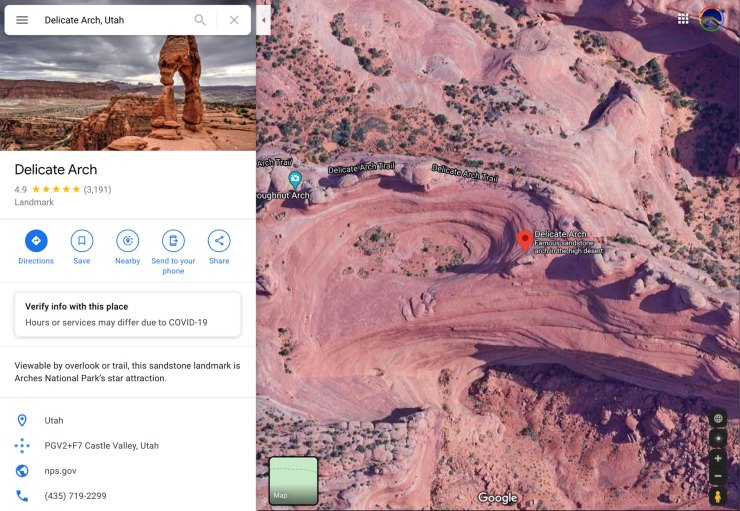
I will often change the map to satellite view. This gives me an idea of what the terrain looks like and provides further context and visual information.
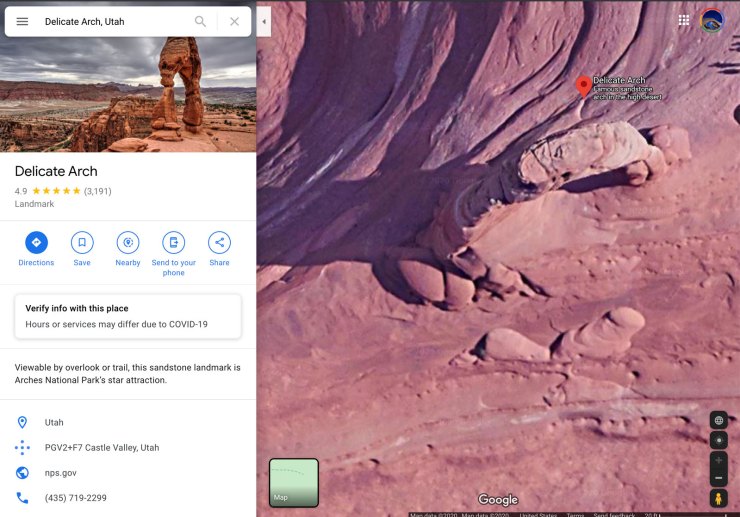
I like to zoom in and look around. You can look at the orientation, determine which way it is facing and get a strong idea of the surroundings.
I wanted a photo of the otherworldly Delicate Arch looking up while facing more or less south. The screenshot above shows you the valuable visual information that one can gain from zooming in using its satellite view.
Social media sites
I often will check social media or photography sites such as Flickr, 500px, Instagram and Facebook. I particularly find Flickr and Facebook useful because they encourage a lot of interaction through their groups. I can often contact the people who created the photographs. I’ve even met up with some of the photographers, making new friends and having a local “tour guides” of sorts. Fantastic!
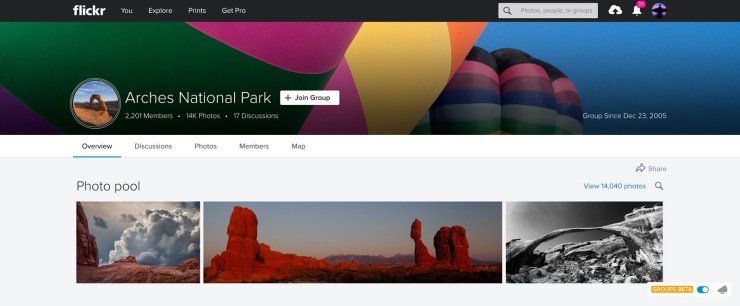
Groups on Flickr or Facebook can be surprisingly specific, and sometimes, scrolling through that area can yield valuable and current information about accessibility and provide more photos. I often join these groups to participate in the discussion.
Because I love photographing abandoned areas, all this information and interacting with others can really help here as well. I received some information about the trails leading up to Delicate Arch, including one area where the trail narrowed to about six feet, with a sheer drop on one side. Yikes!
Determining compositions in advance
Sometimes it’s possible to determine compositions in advance, particularly if you are photographing with specific celestial events in mind. For example, I wanted to photograph Delicate Arch. But I wanted to do so with it framing the core of the Milky Way through a vantage point that I had never seen anyone else photograph before.
Through a combination of The Photographer’s Ephemeris and PhotoPills, I was able to determine that the Milky Way would drift further south and be in the position I wanted by approximately 11 p.m. Both apps also informed me that there would be no moon in the sky to blot out the stars. From this, I had specific times and dates to make this happen!
Both apps help you plan outdoor photography, showing you how light will fall on the subject for day or night in any location on earth. PhotoPills is an actual photographer’s planner which does the above, but also helps you to calculate camera settings and much more.
Winging it
There’s nothing like doing it “old school” and winging it. I love to explore during the day, hiking or driving around, serving sort of as a scouting mission. I’ve found many great places this way. And even more so, there’s nothing like going to a dark sky area and being in the moment, reacting to what makes you gasp with amazement.
For locations like this, I love to choose generally inspiring areas. Since I am located in Southern California, those areas include the numerous National Parks in south Utah, Grand Canyon, Joshua Tree National Park, Salton Sea, White Mountains and the Sierra Nevadas.
About the photo
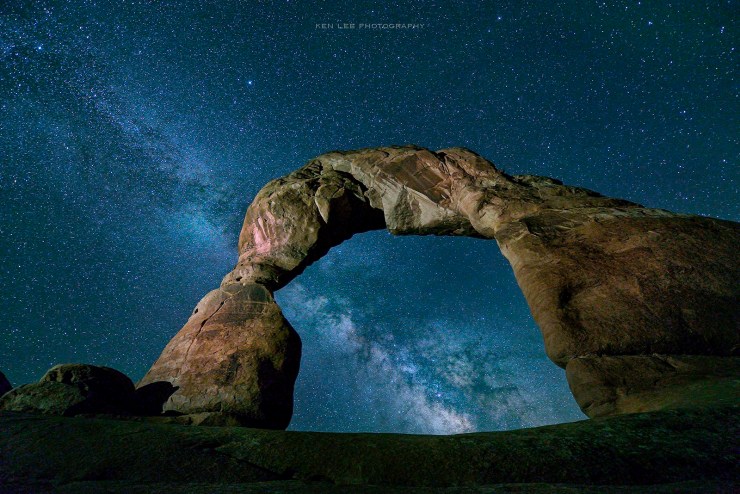
This is the photo that I planned, which I’ve called “Door to Infinity.” As you can see, I achieved my vision. This is an image looking up, the arch framing the magnificent Milky Way.
But I also discovered why I had never seen a photo like this before. At night, it is terrifying to be perched on a ledge below this. You can slip and fall into a large rocky “bowl.” Or you can have your equipment slide down, ensuring certain ruin for either. I can safely say that although I am happy to have created the photo, I will never do that again.
For this photo, I “light painted” the arch with a small Streamlight LED flashlight. This was done to keep it from becoming a silhouette. To do this, I had to walk back and forth between the scary ledge to higher ground. Please note that I photographed this June 2014, before the Park banned “light painting” at night. This was photographed with a Nikon D610 and a Nikkor 14-24mm f/2.8G ED lens at 14mm. A single exposure, I used a 20-second exposure at f/2.8, with an ISO of 4000.
Tell your story with the second annual Visual Storytelling Conference!
Experience four days of interactive, online training sessions featuring a range of educational content with experienced photographers and content creators. This free event kicks off with a series of technical boot camps to build essential skills, followed by live, online sessions on photography, video, business and social media. Join live from March 10-13, 2022!
