
One of the staple shots of wedding photography is the wedding ring photo. Not only can you create some incredible effects, but it’s easy and fun to do. Best of all, anyone can replicate this technique at a wedding or at home with any objects, not just wedding rings.
I’ll guide you through a very simple setup which you can build upon to create more intricate effects. Most of these items you probably have at home. You can also add on to this technique with inexpensive items found at a local craft store or on Amazon.
Setting up the shot
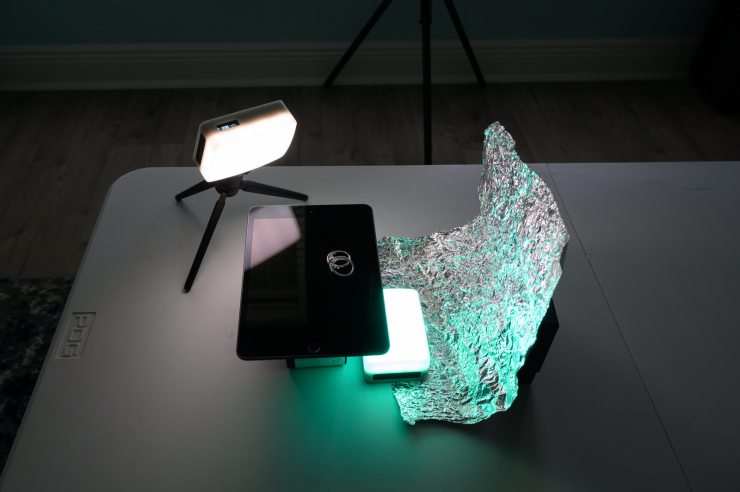
So here is the setup. You will need the wedding rings from both parties. Next, you’ll need a reflective surface. This is going to create a reflected mirror image of the rings in the foreground. One of the best items you can use for this is your smartphone or tablet screen. I like to use an iPad mini.
Leave the iPad, tablet or phone off. You do not want the screen to illuminate from a message or call during the shoot and ruin your photo. Next, clean it with a lint free cloth. Remove all fingerprints, smudges and dust from the screen and lay it flat on a table. Place the rings on the device about two-thirds of the way from the front of the screen, closer to the back. Make sure the rings are clean and dust free.
Grouping the rings together
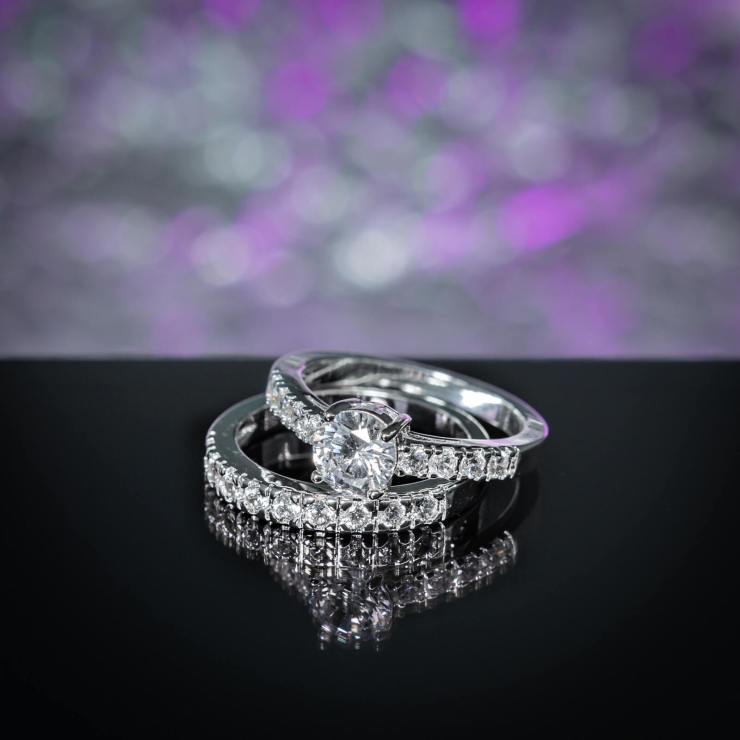
Often with traditional couples, the men’s ring will be large enough that the woman’s ring will fit inside of it. You can use this as a base allowing the woman’s ring to stand upright inside of it. If this is possible, it makes a great shot. If not, lay the rings on top of each other in a pleasing way. There is no right or wrong here, but typically you would want to show the features of the main stone and setting of the ring.
Finding a backdrop
From here you’ll need a backdrop behind the rings. Tin foil can make a great backdrop. It is inexpensive, easy to carry with you and readily available. Just take a sheet of tin foil, lightly crumble it into a ball, and then carefully open the foil so that it is now a very wrinkled sheet.
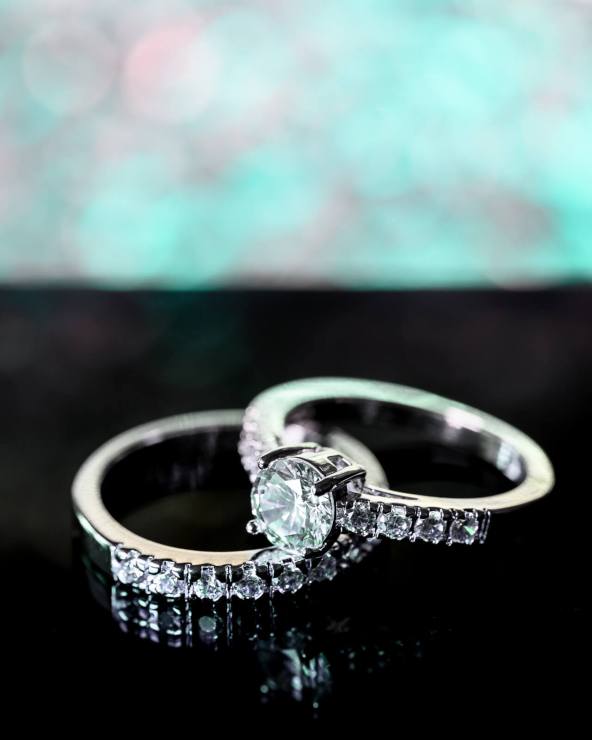
Prop the foil up on anything that you have handy a few inches behind the tablet. The foil will reflect any light you shine on it. You can use a candle, an inexpensive led light, your phone screen, or anything else you can think of to create colors in the foil.
Working with your camera
.mgl-tiles { display: none; } #mgl-gallery-634ed55d04e79 { margin: -5px; width: calc(100% + 10px); } #mgl-gallery-634ed55d04e79 .mgl-box { padding: 5px; } @media screen and (max-width: 768px) { #mgl-gallery-634ed55d04e79 { margin: -5px; width: calc(100% + 10px); } #mgl-gallery-634ed55d04e79 .mgl-box { padding: 5px; } } @media screen and (max-width: 460px) { #mgl-gallery-634ed55d04e79 { margin: -5px; width: calc(100% + 10px); } #mgl-gallery-634ed55d04e79 .mgl-box { padding: 5px; } }
Next, prepare your camera. If you have a macro lens, I suggest you use it for your ring photos. I currently use a 105mm f/2.8 macro lens for my ring shots, but I didn’t always have a macro lens. If you don’t have one, a macro extension tube set is a cheap alternative. An extension tube set can be found online for as little as about $50. If you don’t have either, don’t worry, you can still get the shot, you will just need to crop more in post-production.
I definitely recommend using a tripod, if you have one. If not, rest your camera against the table that the rings are on or something solid that won’t move. Set the aperture on your camera to f/8. You can use your phone, an LED light or a small flashlight to illuminate the ring and act as a key light.
Next, set your shutter speed and ISO to create a good exposure. Once you are all set, focus on the main stone of the ring and take a few shots. Check your photos and adjust your ISO and shutter speed if needed.
Mixing it up
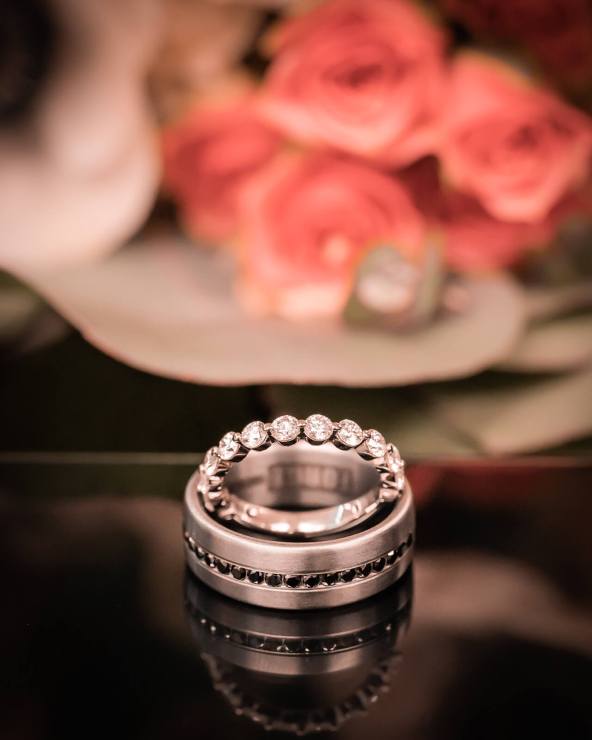
A few simple variations of this setup is to replace the foil background with simple led string lights. For the base you can swap the tablet with inexpensive embossed metallic paper from your local craft store. An inexpensive set of color adjusting LEDs can add all sorts of different color combinations to a foil background. Try placing candles in the background. Flowers make a great backdrop as well. Try placing the rings on the petals of a flower in a bouquet.
There really are endless combinations. You can buy inexpensive cubic zirconia rings to practice with for as little as $20 at many retail stores or online.
The possibilities are endless, and you can apply this technique to any small item that you want to photograph, not just rings, using these fun and unique backgrounds.
Editor’s note: Joseph Nuzzo is a professional photographer specializing in wedding & family photos in the Sarasota area of Florida. Joe began his journey working in a camera store part-time while helping pay his way through college. The fun of picking up a camera just never seemed to get old. Learn more about Joe at ShutterSpeak.net or check out his channel on YouTube.
Tell your story with the second annual Visual Storytelling Conference!
Experience four days of interactive, online training sessions featuring a range of educational content with experienced photographers and content creators. This free event kicks off with a series of technical boot camps to build essential skills, followed by live, online sessions on photography, video, business and social media. Join live from March 10-13, 2022!