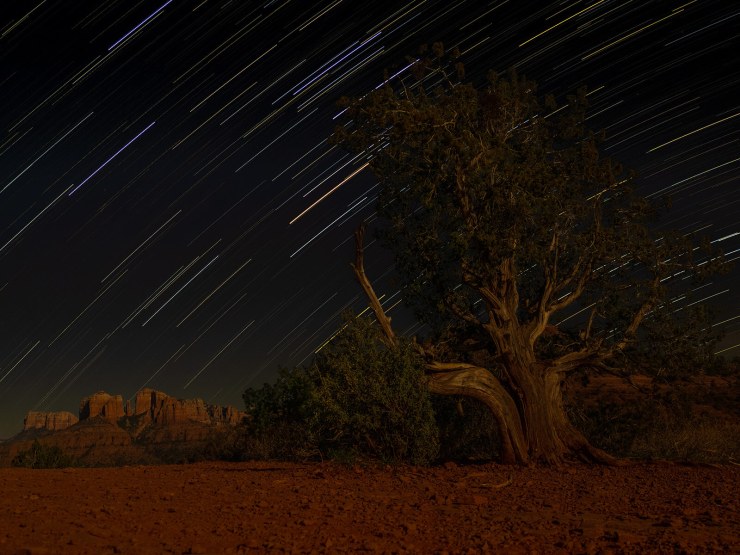
I am enjoying the night sky here in Sedona, AZ. Making star trails is interesting and therapeutic. Standing out in the night watching the trails appear on the back of the camera is quite a treat.
Olympus Live Composite
“Wait Bob! Did you say watch the stars appear on the back of the camera?” Yup, I did.
If you are not familiar with Live Composite, here’s how it works. Determine the proper exposure triangle for creating your scene. I use Aperture Priority and get my composition locked in while testing. You are looking to get enough detail in your shadow areas so they don’t block up.
Then, change to the Bulb Mode and dial in Live Composite. Push the menu button to adjust the shutter speed you predetermined. Set your aperture. The camera will ask you to press the shutter button. It “reads” the scene. Then you can go ahead and create your exposure. And it will continue to make the same exposure until you tell it to stop.
In each subsequent exposure, only new brighter pixels will be added to the image. One beauty of this is that you finish with a single RAW file.
Star trails settings

The above shot featured approximately 30 cycles for 60 seconds each. This added light for a little over a half hour. Each time it extended the trails until I felt they told the story I liked. You get the opportunity to see each exposure added.
When doing night sky photography make sure you are out of a traffic area, as car lights would be added should they appear as well as your headlamp or other lights.
All settings will be dependent upon your situation. Is there moonlight or ambient light hitting your scene? In this case, the moon was a little over half full shedding plenty of light hence the stars being a little sparse. With full dark skies you’ll have the opposite problem — a black foreground. The star trails don’t look that great without a foreground element.
Don’t have Live Composite?
If you don’t have the Olympus Live Composite mode, you can still create star trails. There are two other ways.
One is to make a long exposure as we had to do with film. The other leaves you with more possibilities — make a time-lapse.
Those images can be gang processed and put into layers on Adobe Photoshop. Change the Blend Mode and only the brighter highlights register on the image below. Sounds a lot like Live Composite, doesn’t it?
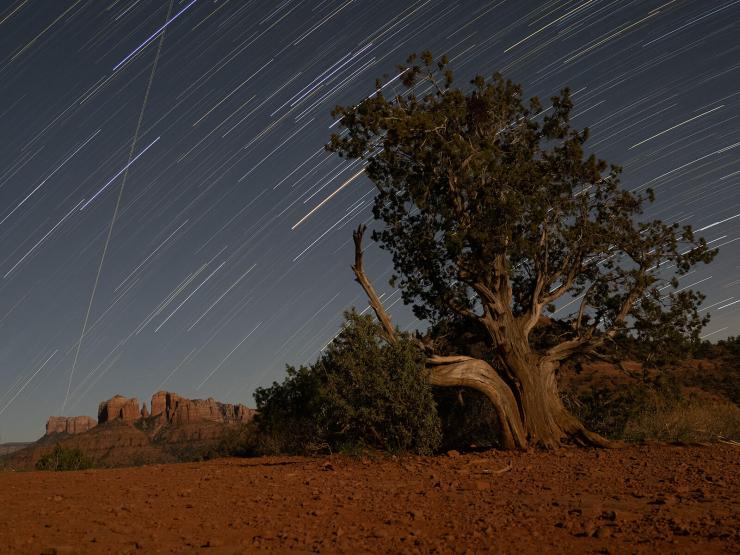
The benefit of a time-lapse is that if stray light invades your scene you don’t loose the whole time. You can remove those frames or the frames with aircraft streaking through the sky. Here’s the original capture before processing. I had to clone out the jet lights.
The other benefit of a time-lapse is that you can tell the story of the shoot in another way.

The proper tool for the job
Always remember there’s a proper tool for the job at hand. You make the decision that works best for your situation and workflow. For these shots, I used the Olympus OM-D E-M1 Mark III and 12-100mm f/4 M.Zukio PRO lens. I used a Platypod, as there was a bit of a breeze. With the Platypod so low to the ground, I wasn’t worried about any slight movement messing about with my photo.
Yours in Creative Photography, Bob
Tell your story with the second annual Visual Storytelling Conference!
Experience four days of interactive, online training sessions featuring a range of educational content with experienced photographers and content creators. This free event kicks off with a series of technical boot camps to build essential skills, followed by live, online sessions on photography, video, business and social media. Join live from March 10-13, 2022!
