Blunders. Mistakes. Doing too much or too little. It happens to most of us when we start out.
As you read this, think back to when you were beginning photography. I’m sure you’ll be able to relate to this yourself and hopefully laugh (and not cry).
Alright, so this list may not be super accurate list of blunders. It is in no particular order. I think it’s safe to say that every beginning photographer has experimented with at least four out of the five blunders. Yes, I did and I have had to work through these as I grew and became more experienced in photography.
The goal with portraiture is to make that person look their best and convey personality and emotion. Too much post-processing can distract from that goal and actually work against it. If you’re new to photography and find yourself doing things in this list over and over, perhaps it is time to take a more sophisticated approach. Recognize what you do and do your best to improve. That’s what makes us become more advanced, right? This, essentially, is a list of stepping stones toward greatness. Horrible image causing stepping stones toward greatness.
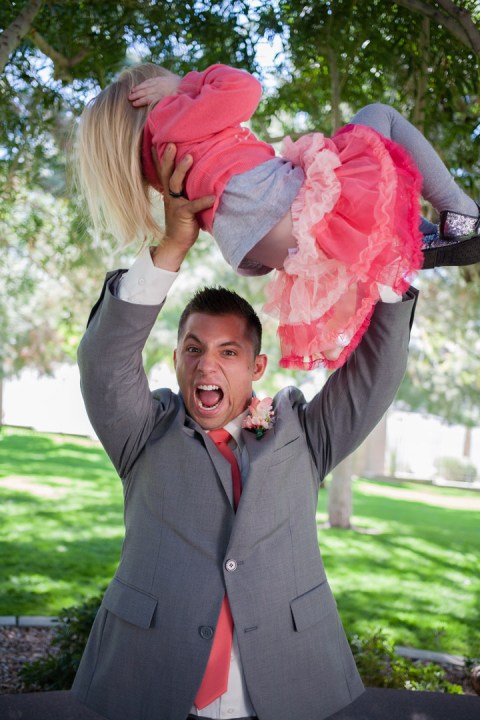
Provided for your visual pleasure is this visual reference — the original image.
Author’s Note: I am not responsible for damage to any eyeballs. Please consult a physician if you experience a loss of brain cells. I sure did take this random picture, and I sure do have permission to edit this picture horribly 🙂
1. Plastic skin
The silky smooth skin that the artists behind magazines and advertisements sport is typically pretty dang hard for us normal-folk to achieve. The skin is something that I’ve noticed so many beginning photographers focus on prior to the rest of the pieces of the actual image. Meaning, they disregard composition, lighting, exposures and other things and pay more attention to over-adjusting the skin to make it seem like a “good” picture.
Skin texture is important in a portrait. Don’t paint, filter, erase or otherwise replace good skin texture for plastic skin — it’s the hallmark of a beginner photographer. That skin texture is a big help in displaying depth and overall feeling in a portrait. Learn different techniques for handling skin. I personally use frequency separation.
2. Heavy contrast blunders
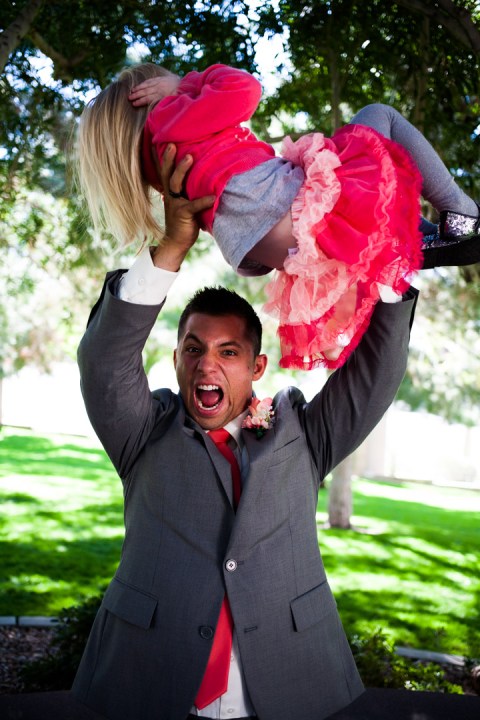
On a slider from 1 to 10, this slider goes to 11. OK, not really, but if it did, I’m sure that it would’ve been pushed that far. Third-party applications and iPhone apps often provide a quick and easy way to edit a picture in the form of filters. Way too many of these filters bump up the contrast. By bump up I really mean grab a hold of the slider and crank it to the MAX.
Contrast can help set the mood of a picture, especially when you’re shooting something dramatic and edgy. Too much contrast can wash out skin tones, make some colors more dominant and make you lose other details that may be good to have in the portrait, like dark hair and clear eyes. A good solid rule that I’ve set for myself when I adjust contrast is this: Pull back the contrast just a bit from where I intended. Just a bit. That little, itty bit will help a lot.
3. Selective color
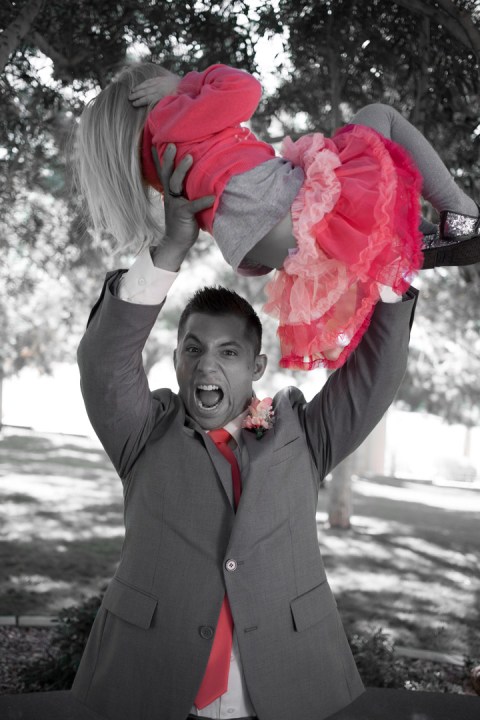
I occasionally like a good selective color portrait shot. Occasionally, stated numerically, is probably around one out of every 400 or so. Maybe 800. When I look at a portrait, I’m pretty sure I can recognize the color of ones eyes, match it to the color of their tie, shoelaces, flowers in the background, light bulbs and other random items all on my own — without the aid of muddy grays and surrounding blacks and whites, although I appreciate the help.
It is a fun fad that has come and gone with the exploration of Photoshop, and is a great exercise for those learning how to use it. It can sometimes be cool, don’t get me wrong, but it isn’t going to make you money or help you become a better and more advanced portrait photographer. The one exception I would make is if you’re exercising color theory and meaning through the dramatic expression of color as found in the movies Schindler’s List or Sin City, which is rarely properly executed in portraits.
4. Selective sharpening
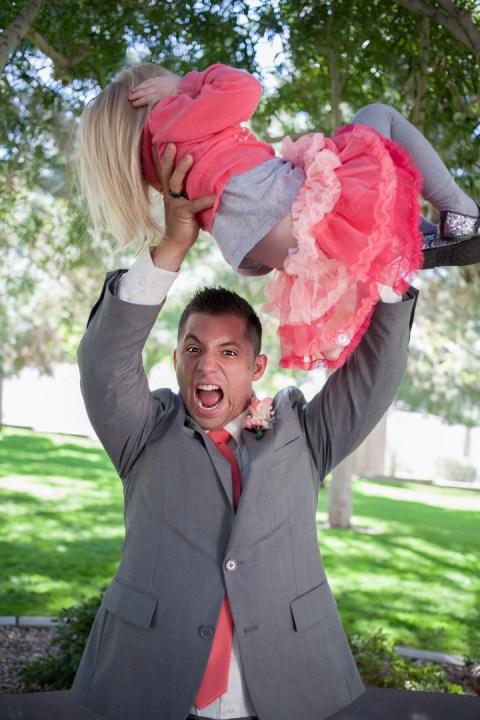
Example: Razor sharp eyes on an otherwise blurry or plastic face. I haven’t seen people selectively sharpen anything else but the eyes but when they do, the result makes my eyes bleed.
OK, that might have been a little harsh. Tone it down a little. There’s nothing really wrong with selectively sharpening eyes — except when you selectively over-sharpen eyes. So don’t do that, it is distracting and can also be considered a weapon.
5. Over-saturation blunders
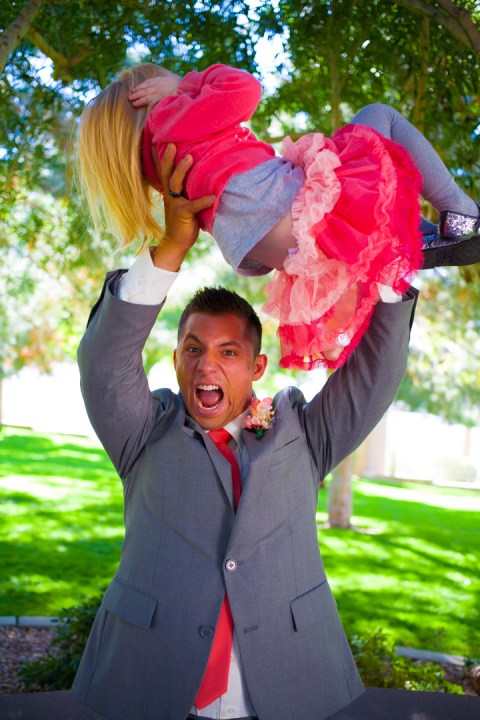
My favorite thing to see is a beautiful blonde girl whose her hair has been edited to the yellow of a school bus on an otherwise natural-looking picture. A close second is when blue jeans are turned into the same blue as the sky. Another favorite would probably be radioactive-green grass. At this point, I’m on a roll in my head but I’ll just name one more: A photo that looks like it was colored in with highlighters.
Adding saturation can be a good thing, especially when the picture lacks it. I feel that adding saturation does wonders in landscape pictures. But, in portraits, it may cause some issues such as; unnatural skin tones, strangely vivid colored clothing, or a color cast that wasn’t originally apparent becoming amplified. Typically when someone increases contrast, saturation naturally increases as well, and when the contrast slider goes to 11, it isn’t common to see this slider in the double digits as well.
While editing is a necessary skill to learn in photography, the best way to improve your photography is through the learning and application of the elements of composition and lighting. Once those are learned and applied, editing becomes much easier, and you’ll feel less of the need to overdo things and crank sliders to the MAX.
Also, there shouldn’t be any shame if you end up doing something on this list. There definitely are pictures, sometimes portraits, that call for some extra sharpening action or extra heavy contrast. Exceptions are made all the time. Perhaps it’s time to try something new and expand your editing skills beyond what is easy and normal. Remember these are all horrible-image-causing-stepping-stones toward greatness.
But wait, there’s more! There are five MORE blunders to know about!
Tell your story with the second annual Visual Storytelling Conference!
Experience four days of interactive, online training sessions featuring a range of educational content with experienced photographers and content creators. This free event kicks off with a series of technical boot camps to build essential skills, followed by live, online sessions on photography, video, business and social media. Join live from March 10-13, 2022!
