If you’re relatively new to owning the Canon EOS R5 and haven’t done a deep dive on its functions, you may have missed a neat new feature: Touch and Drag AF. This feature allows you to drag your thumb on the rear LCD screen to move your focus point(s) while looking through the EVF.
As someone who generally prefers to photograph while looking through the EVF, I’ve found this feature to be pretty handy. Below I will do a quick breakdown how to customize and use this new feature.
Enabling Touch and Drag AF
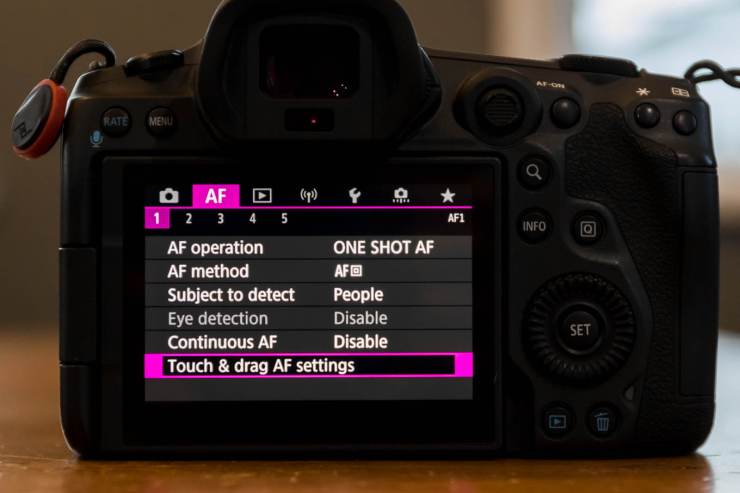
To enable this feature, hit your Menu button, then go to AF menu 1. At the bottom of the list you will see Touch and Drag AF settings.

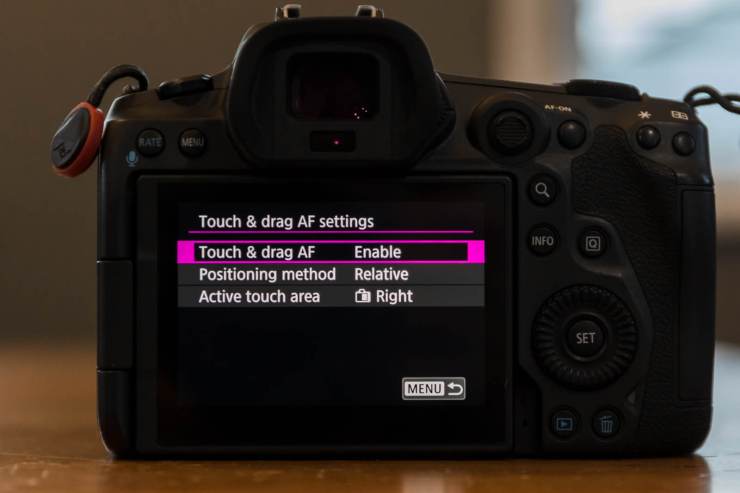
In the next menu, you can choose to enable Touch and Drag AF.

Customizing Touch and Drag AF
Active touch area
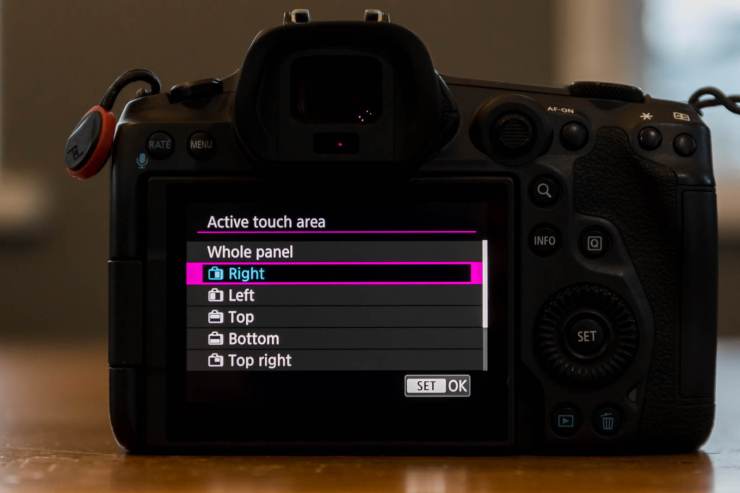
Canon gives you nine different options to customize your active touch area. The active touch area is the area that you will be moving your thumb across on the rear LCD screen to move your AF points.
Again, the option you choose will be determined by personal preference. For the average right-handed user, selecting Right or Top right will most likely be the best option. Users with particularly large hands, or those that are left-handed may prefer one of the alternative choices. It’s easy to select each option to try out and find what you like.

Positioning methods
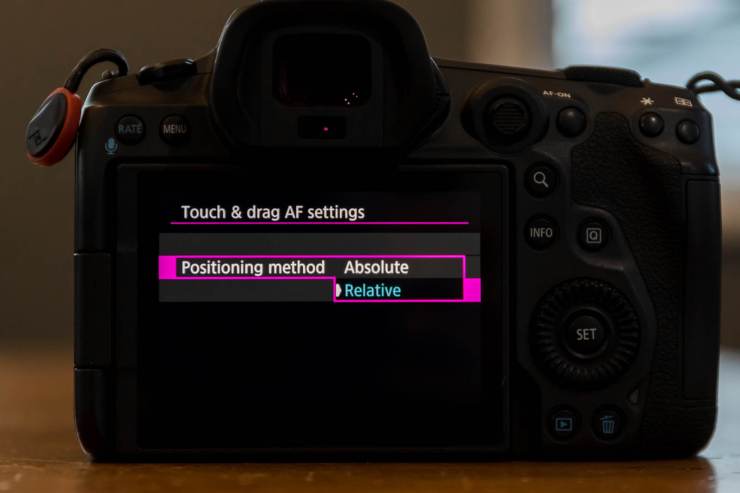
Here, you have two choices: Absolute and relative. With absolute, the AF points move to the touched or dragged position on the screen. In theory, this sounds good but I personally find it less effective than the second option, relative.
With the relative positioning method chosen, the AF points move in the direction you drag your thumb, by an amount corresponding to the amount you drag. This allows you to start moving your AF points by placing your thumb anywhere on your active touch area. I find this method much easier to use. Again, it’s easy to quickly try both options and see what works for you.

Downsides to using Touch and Drag AF
The main downside that I have found with using Touch and Drag AF is that sometimes I accidentally hit the active touch area on the LCD screen with my nose. This of course moves the focus point. It hasn’t happened often, but it is worth mentioning.
Secondly, people who are accustomed to using the joystick for moving their AF points may find the Touch and Drag AF less precise. When using one of the larger AF zones, I find Touch and Drag AF to be perfectly adequate. When using single point AF, I have started using a combination of Touch and Drag AF and the joystick. To make a large change to my single point AF (for example moving it from the left to the right), I use the Touch and Drag setting which is super fast. I can then quickly fine-tune my exact focus point by using the joystick if I need to. By having my active touch area set to Right, the joystick is located just above where my thumb stays, so it’s easy to use both.
Overall, it’s worth trying Touch and Drag AF to see if it works for you. For many instances I find this focusing method to be much faster than using the joystick or one of the other methods of focus available with the R5. As always, customizing the functions to your personal preferences will take a little bit of trial and error but may be worth the effort if you end up loving the feature as much as I do.
Tell your story with the second annual Visual Storytelling Conference!
Experience four days of interactive, online training sessions featuring a range of educational content with experienced photographers and content creators. This free event kicks off with a series of technical boot camps to build essential skills, followed by live, online sessions on photography, video, business and social media. Join live from March 10-13, 2022!
