
Distractions in your images can make a great image, not quite as great as it could have been. When you are creating an image, it’s important to be aware of the foreground, background and sides of the entire scene, not just the main subject. It may seem like a very small thing to be watchful of, but it can make or break your image.
I’ve noticed that when I’m helping other photographers with their images, one of the most common issues is distractions in their photos.
Be aware of what is in the viewfinder
Distractions can be little things poking in from the sides of the frame or larger objects behind the subject of the image. Many times these distractions could have been avoided by paying attention to what is in the viewfinder when you are composing the photo as you are photographing. Look for a clean background, move around until you find the best spot.
.mgl-tiles { display: none; } #mgl-gallery-634ee2e37477a { margin: -5px; width: calc(100% + 10px); } #mgl-gallery-634ee2e37477a .mgl-box { padding: 5px; } @media screen and (max-width: 768px) { #mgl-gallery-634ee2e37477a { margin: -5px; width: calc(100% + 10px); } #mgl-gallery-634ee2e37477a .mgl-box { padding: 5px; } } @media screen and (max-width: 460px) { #mgl-gallery-634ee2e37477a { margin: -5px; width: calc(100% + 10px); } #mgl-gallery-634ee2e37477a .mgl-box { padding: 5px; } }
First frame (unedited)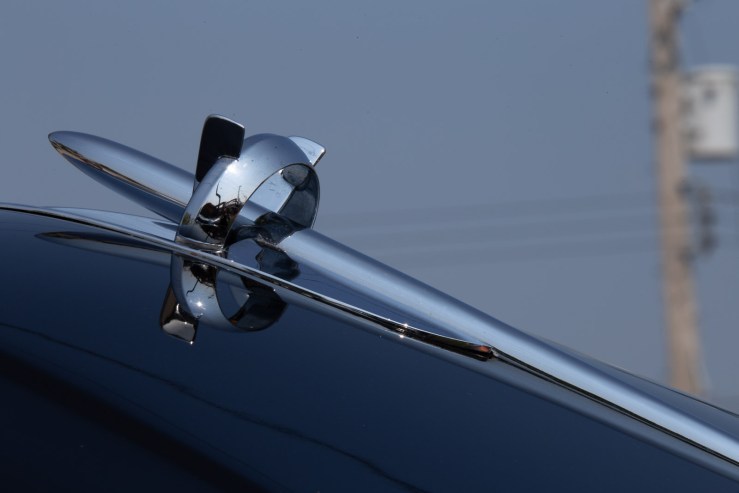
Frame I used to edit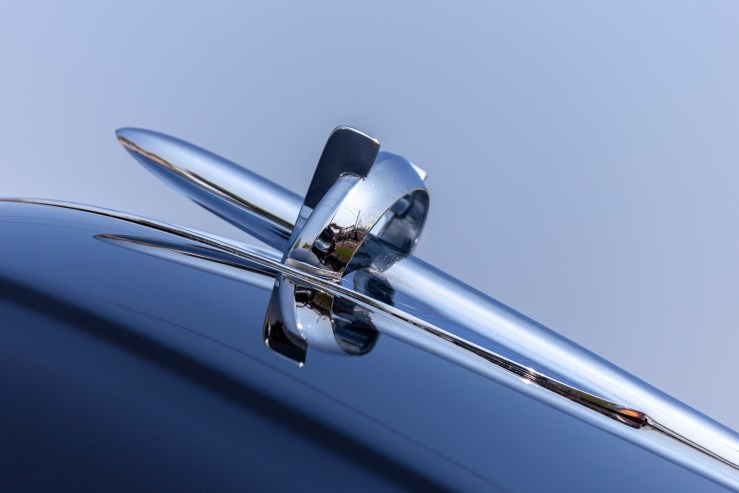
When I am photographing car shows, I am uber aware of what is in my viewfinder. There are so many distractions around. People, buildings and trees are the main culprits.
In this example, the first image was my initial try, but I knew it wouldn’t work, not without more Photoshop than I have the patience for. So I kept creating images from different angles to get a distraction-free image. No Photoshop was needed.
Easy solutions
The easiest way to fix these distractions is to move around when you are out photographing. Sometimes all it takes is a slight step to your left or right. Or, move above or below your subject to isolate it from the background that is too busy.
If the distracting objects are on the outer sides of the frame, either move in closer to your subject or use your telephoto zoom to get them out of the frame.
Using a shallow depth of field can also help but that will depend on what is being blurred by bokeh. It can potentially still be a bit busy and distracting.
.mgl-tiles { display: none; } #mgl-gallery-634ee2e375140 { margin: -5px; width: calc(100% + 10px); } #mgl-gallery-634ee2e375140 .mgl-box { padding: 5px; } @media screen and (max-width: 768px) { #mgl-gallery-634ee2e375140 { margin: -5px; width: calc(100% + 10px); } #mgl-gallery-634ee2e375140 .mgl-box { padding: 5px; } } @media screen and (max-width: 460px) { #mgl-gallery-634ee2e375140 { margin: -5px; width: calc(100% + 10px); } #mgl-gallery-634ee2e375140 .mgl-box { padding: 5px; } }
My initial view (unedited)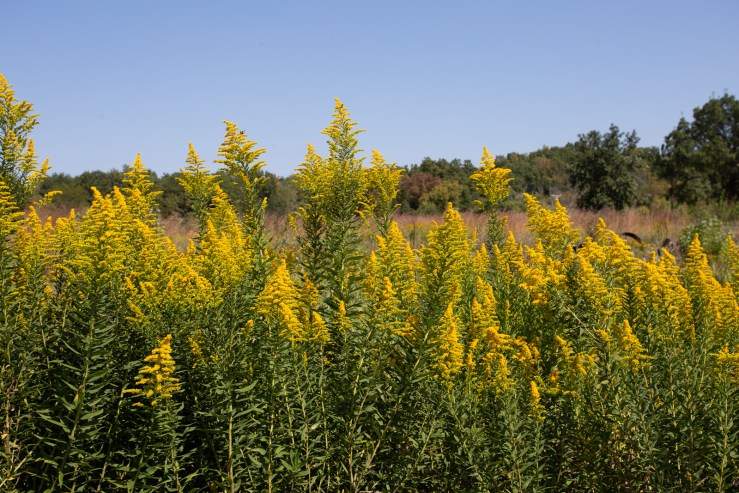
View after moving to a lower point of view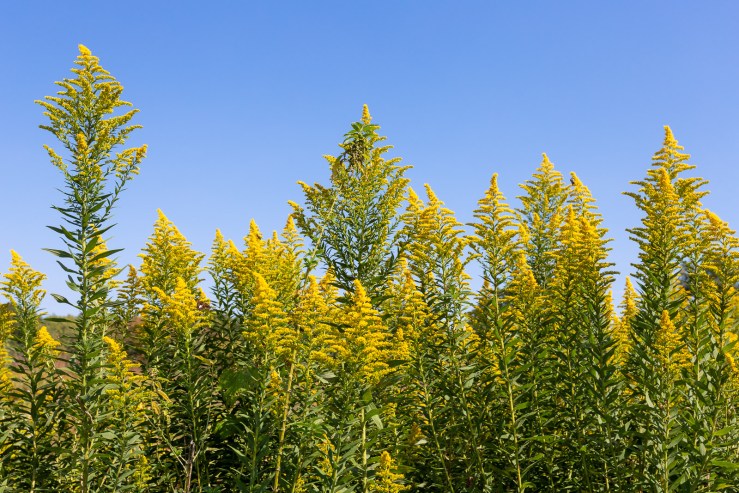
For these yellow flowers (weeds), I loved the scene, the colors and fall feeling to it all. But, the image is too busy. It’s still pretty I suppose, but there are too many levels and layers competing for attention with the yellow flowers.
I got down lower and aimed the camera up at the flowers. Doing this simplifies the scene. In this case, it also makes for a wonderful complementary colors image.
Slow down to see the distractions
I use this technique often when I’m out with my camera. Force yourself to slow down. Spend time with your subject, whether it’s a person, flower, car or landscape. Walk around, be deliberate about looking for compositions within the scene. Take the time to notice those things that could be distracting.
Simple works best when composing images. Keep that in mind.
.mgl-tiles { display: none; } #mgl-gallery-634ee2e375a53 { margin: -5px; width: calc(100% + 10px); } #mgl-gallery-634ee2e375a53 .mgl-box { padding: 5px; } @media screen and (max-width: 768px) { #mgl-gallery-634ee2e375a53 { margin: -5px; width: calc(100% + 10px); } #mgl-gallery-634ee2e375a53 .mgl-box { padding: 5px; } } @media screen and (max-width: 460px) { #mgl-gallery-634ee2e375a53 { margin: -5px; width: calc(100% + 10px); } #mgl-gallery-634ee2e375a53 .mgl-box { padding: 5px; } }
First take (unedited)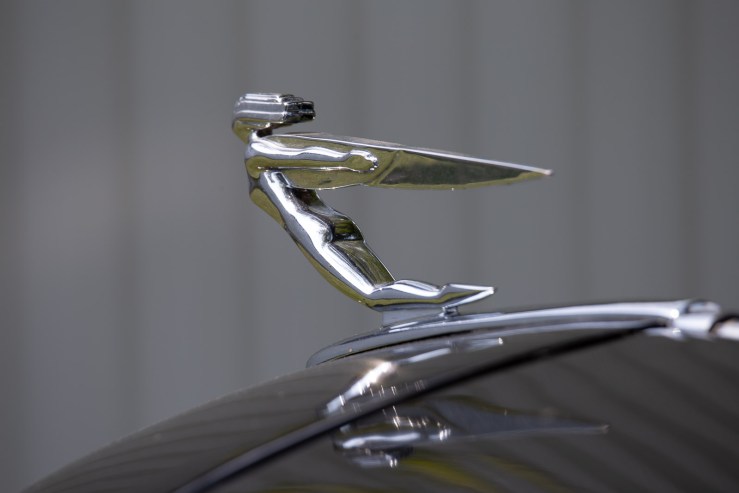
Second take (unedited)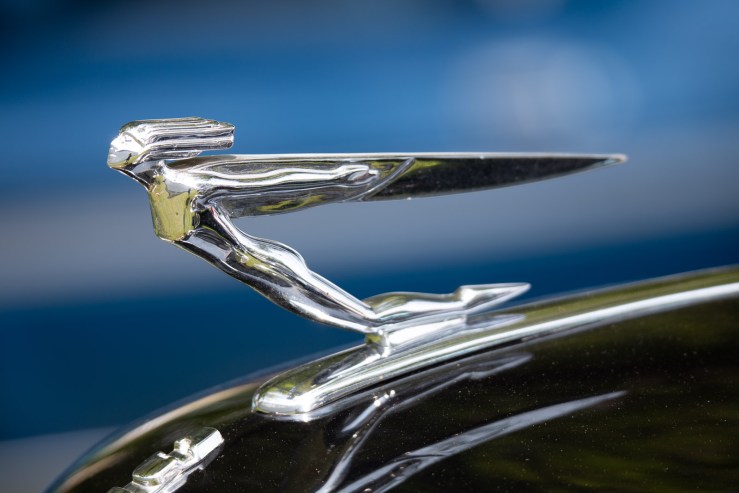
Third take (unedited)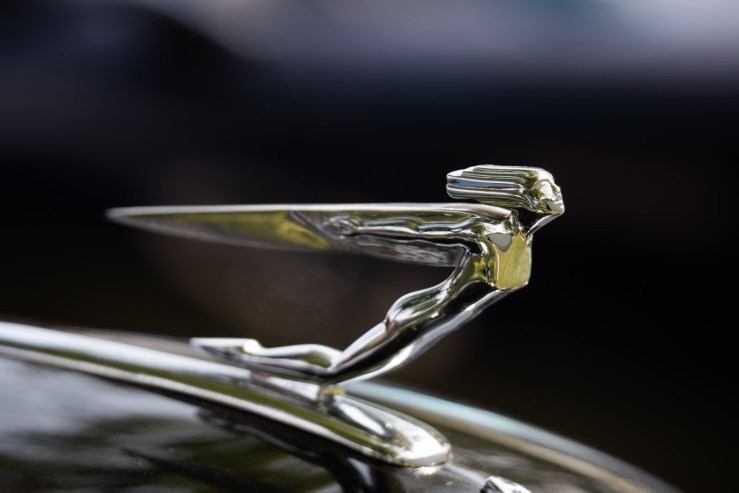
For this particular hood ornament, if I had taken my one photo and moved on to the next car I might have been a bit disappointed. While the lines of the building make the background a little unique, they are also reflected in the hood of the car. Could I have made this work? Likely for a little bit of a creative and artsy edit. But, those lines take away a little bit of the focus from my subject which is the hood ornament.
By slowing down, spending more time walking around this car and looking for different angles, watching for different colored backgrounds I ended up with the attention more focused on my subject. For more tips on specifically photographing car shows, check out this article.
It doesn’t take much effort really to create images that are just that much better. Many times, it’s the little things that will take your photography up a notch. Practice patience and practice seeing before you press that shutter button.
Tell your story with the second annual Visual Storytelling Conference!
Experience four days of interactive, online training sessions featuring a range of educational content with experienced photographers and content creators. This free event kicks off with a series of technical boot camps to build essential skills, followed by live, online sessions on photography, video, business and social media. Join live from March 10-13, 2022!