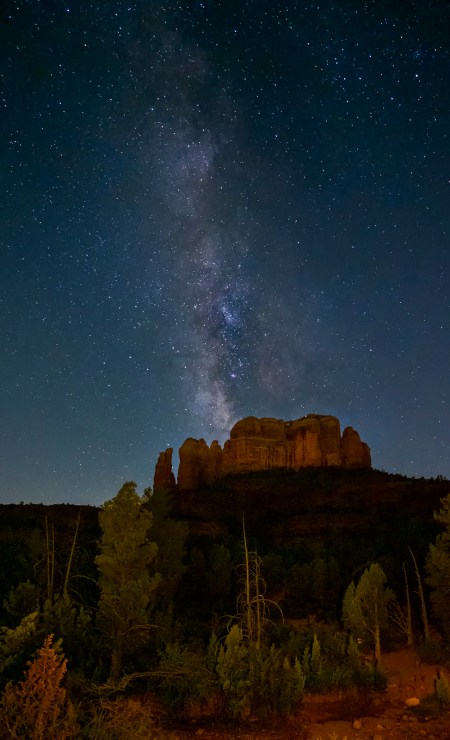
I relish the time I have exploring the heavens. Milky Way photography gives me the excuse to head out and spend time in nature. Once I’m setup, long exposures and experimentation give me time to appreciate life.
Capturing the Milky Way
This is one example of getting the Milky Way recorded. One thing to note is most times you need a foreground of interest for a solid image. In Sedona, I have an advantage of dark skies and red rocks. Combining them both works for me.

PhotoPills to guide the way
Having PhotoPills on my phone comes in handy when I wish to check a location for Milky Way position. Using the Night AR feature, I can dial in exactly where the Galactic Core will be at any given date and time. Even during the day, the Milky Way can be superimposed over the scene in front of me.
For an app to do as much and as well as PhotoPills does, I don’t understand how they can sell it for under $10. If you photograph landscapes and starscapes, this is a tool to have in your arsenal. If you want to learn more, check out our coverage on PhotoPills for iPhone and Android.
Extra light to bring out the foreground
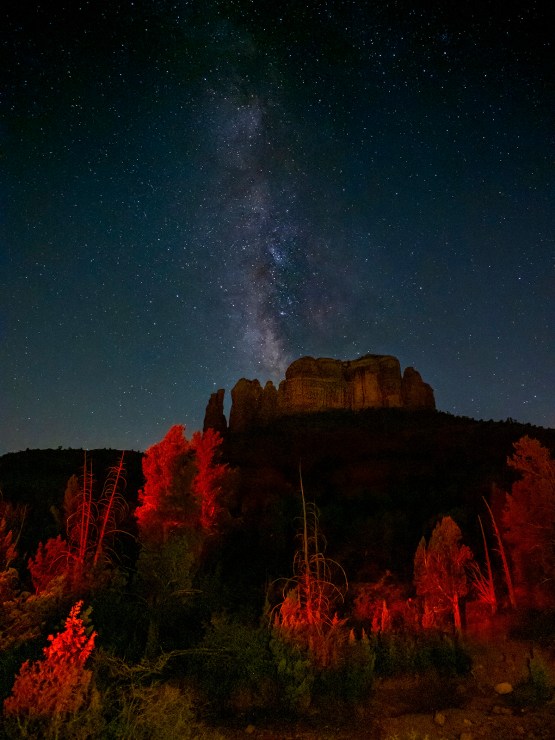
Since I didn’t arrive on scene until after dark, I couldn’t make an additional exposure for combining with the night sky. If this scene was left in pure darkness it would not have been a solid image in my opinion. Silhouettes can work, but I believe starscapes need more life on most occasions.
To get around this, I used a Lume Cube Panel Pro. The light was turned to its lowest setting with just a bit of warmth dialed in. While the 20-second exposure was recording, the light was painted into the scene to bring out the foreground.
Happy accidents

Be aware that during long exposures things might not always go as planned. When I first started astro imaging I used to be annoyed that car lights would pollute the scene. Now I look for those “happy accidents” to add something of which I hadn’t thought.
In this case, a car added its taillights to the scene. It was a little challenging in post-production to tame the lights, but I think it made for a totally different look.
Camera gear
I use the Olympus OM-D E-M1 Mark III camera, which has a handy feature called Starry Sky AF. In the past, it has been a challenge to know the stars a locked on focus with other gear. An entire evening of shooting could be canned due to blurry stars. Starry Sky AF locks on the stars for an accurate focus.
One note when using Starry Sky AF: There might not be a star bright enough in your viewfinder. Or if the focus point is not over a bright star, it will not return a result. When that happens you can point you camera toward a brighter star or planet, get the focus and you are good to go. I have back-button focus enabled, so triggering new exposures does not restart the Starry Sky AF with each exposure. These were made with the M.Zuiko 7-14mm f/2.8 PRO lens. Most times when you have a choice, wider and faster glass is better.
Yours in Creative Photography, Bob
Tell your story with the second annual Visual Storytelling Conference!
Experience four days of interactive, online training sessions featuring a range of educational content with experienced photographers and content creators. This free event kicks off with a series of technical boot camps to build essential skills, followed by live, online sessions on photography, video, business and social media. Join live from March 10-13, 2022!
