
Have you ever gone to your favorite sunset spot and attempted to capture the perfect sunset only to be disappointed by a washed out, under or over exposed and just outright underwhelming sunset image? Then have I some tips for you!
First, camera and lens/focal length selection
The reality is, in today’s time, virtually any camera can get you a great sunset image. What it really comes down to is lens/focal length selection. Personally, I like to shoot wide — ultra wide — think 14-24mm. My camera and lens of choice are the Nikon Z 6II and the Nikon 14-24 S for the Z mount line of cameras. It’s a wonderful combination.
Stability
Next, you’ll need a tripod. Since we want to shoot at narrower aperture settings to get the whole scene in focus, that can mean slower shutter speeds. Even with today’s IBIS (in-body image stabilization) and IS — image stabilization on lenses — I find that my results are just better when I use a sturdy tripod.
For today’s photoshoot, I’m using the iFootage 65″ Carbon Fiber Video Tripod — an outstanding value tripod with excellent stability! The tripod head is a Really Right Stuff BH-55 ball head. It’s a high quality ball head that is tremendously refined and a joy to use.
Take control of your camera! That means get off Auto mode.
The most common mistake I see new photographers make is letting the camera make exposure decisions for them. The good news is, in order to capture the perfect sunset you don’t have to shoot in Manual (M) mode.
I know the thought of Manual mode will make many a new photographer shudder with unease. Fortunately, great sunset shots can be achieved using many of the semi automatic modes your camera offers. I like to recommend Aperture Priority (A on Sony and Nikon, Av on Canon) to newbies. Shutter priority (S on Sony and Nikon, Tv on a Canon) will suffice and if you’re comfortable, you can use Manual mode as well.
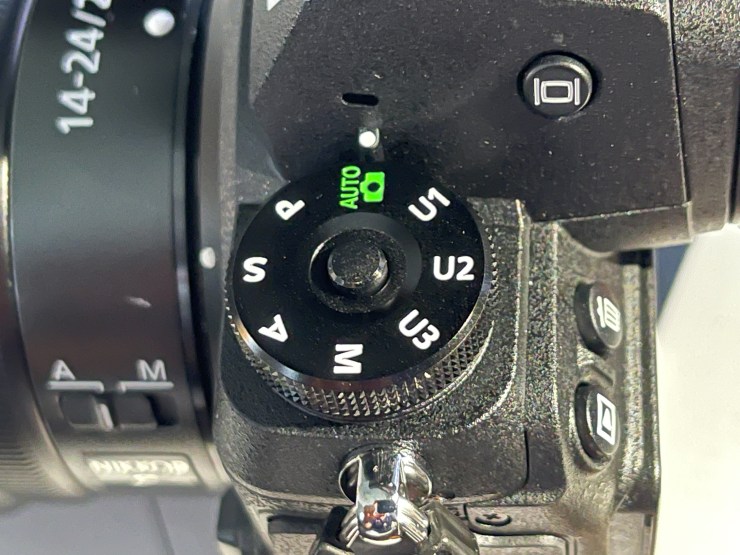
Based on my experience, Manual mode is the way to go. Auto mode — or the green box on the mode dial — will simply not work as effectively.
The key is you controlling the exposure value, not letting the camera do it for you
In automatic mode, you’re leaving every decision about an image up to the camera to decide how to capture the photo. The camera will analyze the scene and select what it believes to be the correct exposure.
By in large, the camera’s brain will do a good job and will take a perfectly average photo. But we’re not going for average. We want something we can hang over the fireplace, we need epic — and well, Auto isn’t going to cut it!
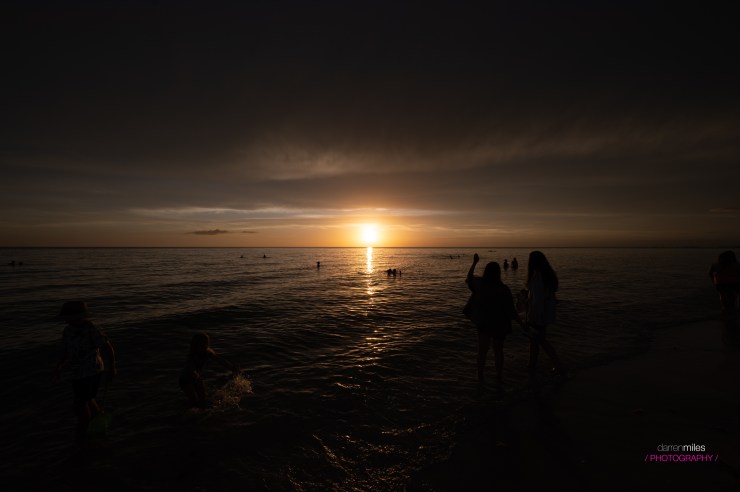
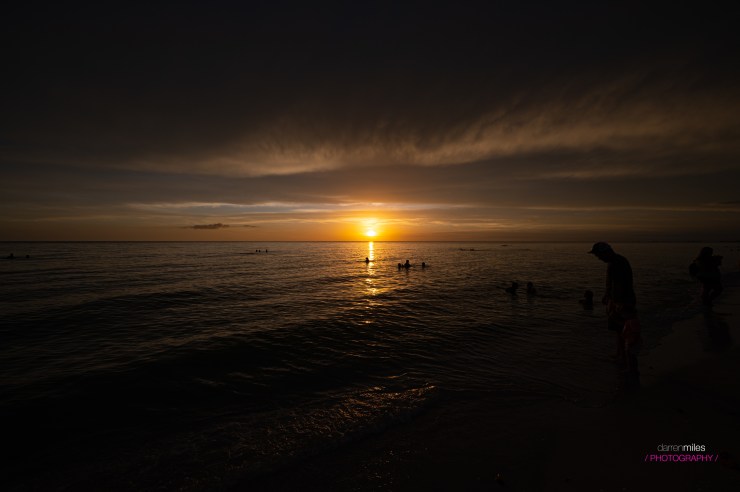
Auto mode will often leave the important bits — the extreme highlights of the sun overexposed because the camera is tying to evaluate the entire scene. The shadows will often look underwhelming and underexposed as well.
Semi-automatic or Manual to the rescue!
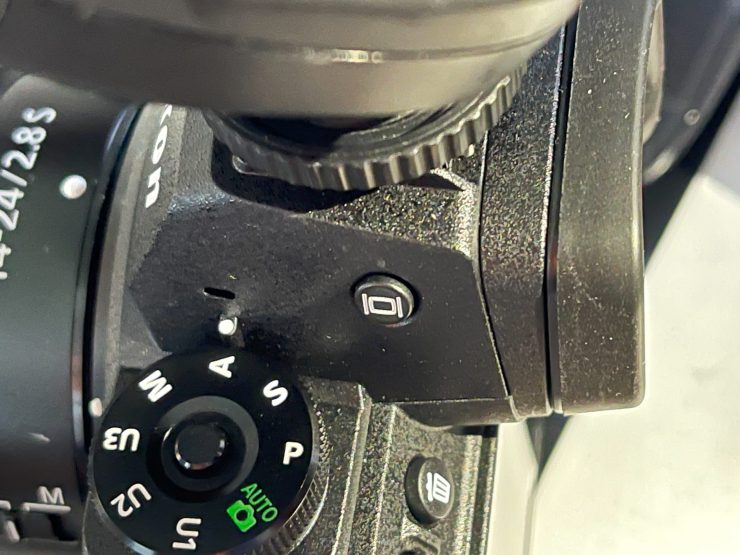
For this demonstration, I’ll being using a Nikon Z 6II. Let me first show you what happens when we put the camera in Auto mode.
Aperture Priority
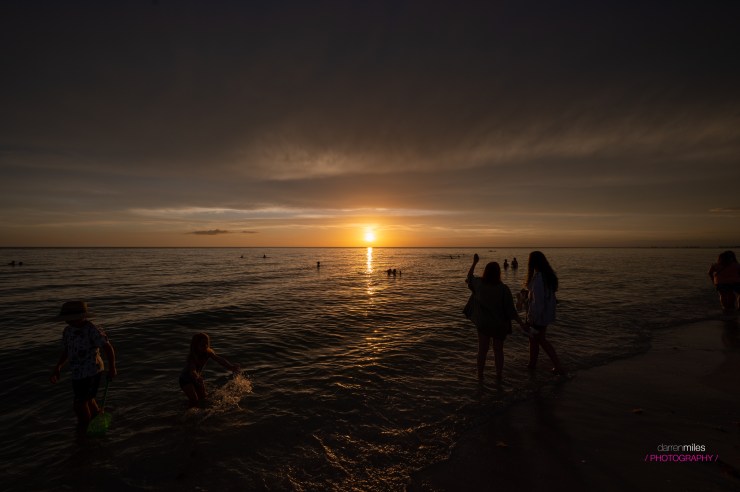
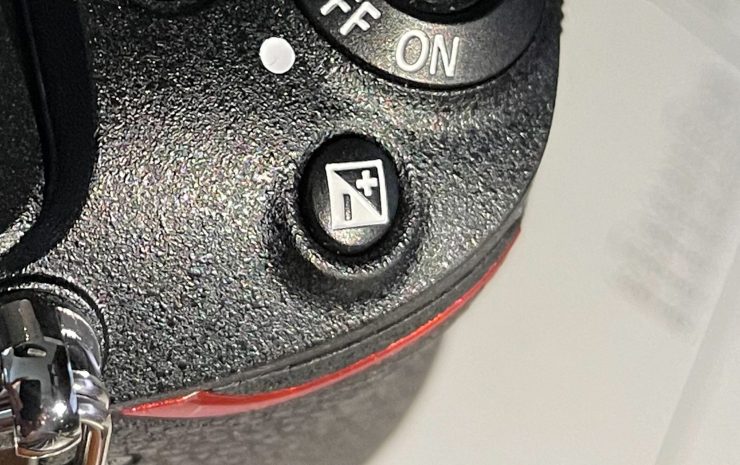
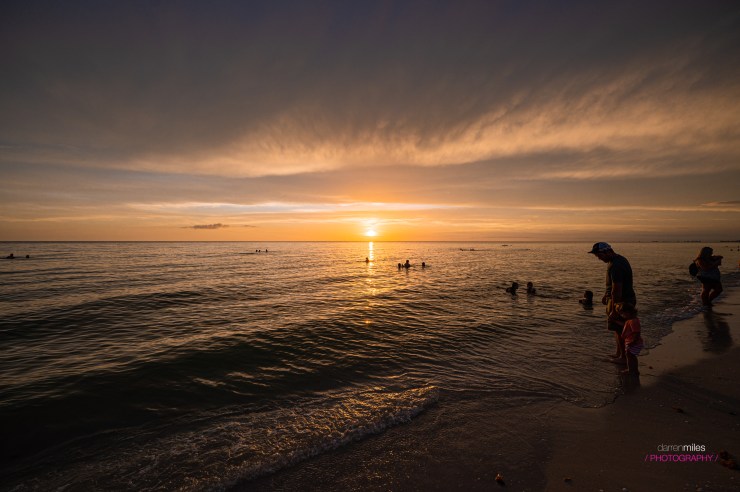
Next I switched to A — or Aperture Priority mode. But more importantly, I set the camera’s Exposure Value (or Exposure Compensation) — EV to -1. I do this to underexpose the whole scene. But I’m still letting the camera do most of the work. To set the EV, press and hold the +/- button and rotate the command dial. The EV will respond.
.mgl-tiles { display: none; } #mgl-gallery-634eec9d18767 { margin: -5px; width: calc(100% + 10px); } #mgl-gallery-634eec9d18767 .mgl-box { padding: 5px; } @media screen and (max-width: 768px) { #mgl-gallery-634eec9d18767 { margin: -5px; width: calc(100% + 10px); } #mgl-gallery-634eec9d18767 .mgl-box { padding: 5px; } } @media screen and (max-width: 460px) { #mgl-gallery-634eec9d18767 { margin: -5px; width: calc(100% + 10px); } #mgl-gallery-634eec9d18767 .mgl-box { padding: 5px; } }

.mgl-tiles { display: none; } #mgl-gallery-634eec9d196ec { margin: -5px; width: calc(100% + 10px); } #mgl-gallery-634eec9d196ec .mgl-box { padding: 5px; } @media screen and (max-width: 768px) { #mgl-gallery-634eec9d196ec { margin: -5px; width: calc(100% + 10px); } #mgl-gallery-634eec9d196ec .mgl-box { padding: 5px; } } @media screen and (max-width: 460px) { #mgl-gallery-634eec9d196ec { margin: -5px; width: calc(100% + 10px); } #mgl-gallery-634eec9d196ec .mgl-box { padding: 5px; } }
Post processing can always be done to taste. I like to shoot underexposed and then do my magic in Lightroom. Under exposing an image can be achieved in any of the semi automatic modes; Aperture, Shutter or Program. Just press and hold the +/- button and then rotate one of the command dials.
Similar results can be achieved in Program, Shutter Priority and Manual
When I use Shutter Priority, I go through the same steps. I’ll set the exposure to -1 and then I’ll set my shutter speed. The camera will then set the f-stop to match the appropriate exposure.
When I shoot in Manual — which is how I shoot most of the time — then everything is up to me. I like to make sure everything is in focus, meaning I like to shoot around f/8. This will insure a sharp image across the frame. I’ll then manually set the shutter speed to get me to -1.0. That speed is variable and dependent on the natural light in the scene.
You’ll need to keep and eye on the exposure value, because as the sun drops, so does the natural light and the exposure value. One of the nice things about the semi-automatic modes is they will keep up with exposure for you.
Bonus points: Adjust your white balance
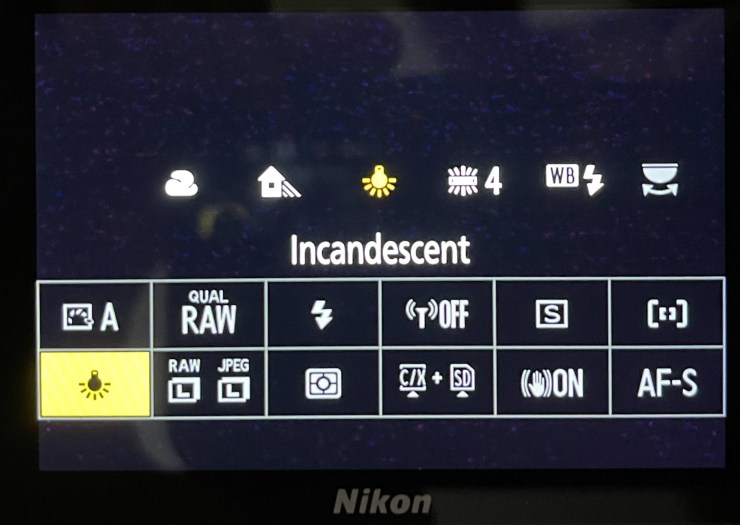
Sometimes to create something a little more creative, I’ll adjust my white balance to incandescent, which will make the whole scene turn blue. The combination with the with yellow/orange/red of a sunset can give us something truly epic. White balance, like exposure compensation, can only be set in semi-automatic modes or in Manual mode.


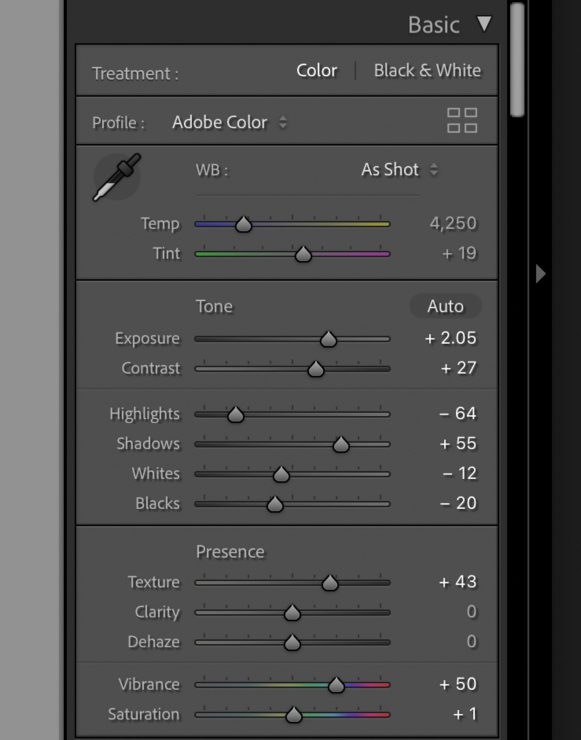
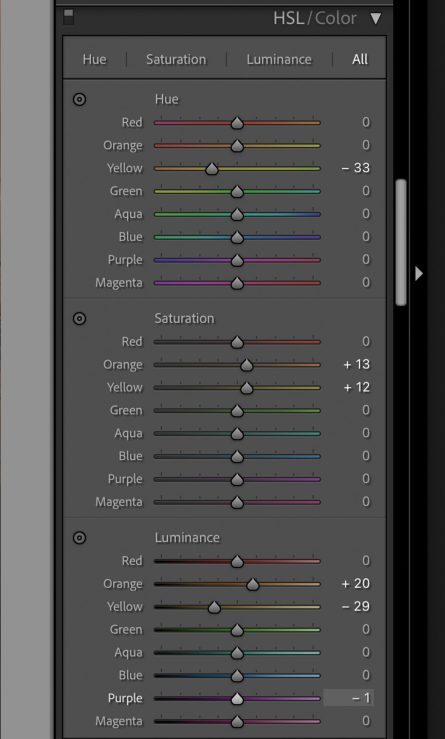
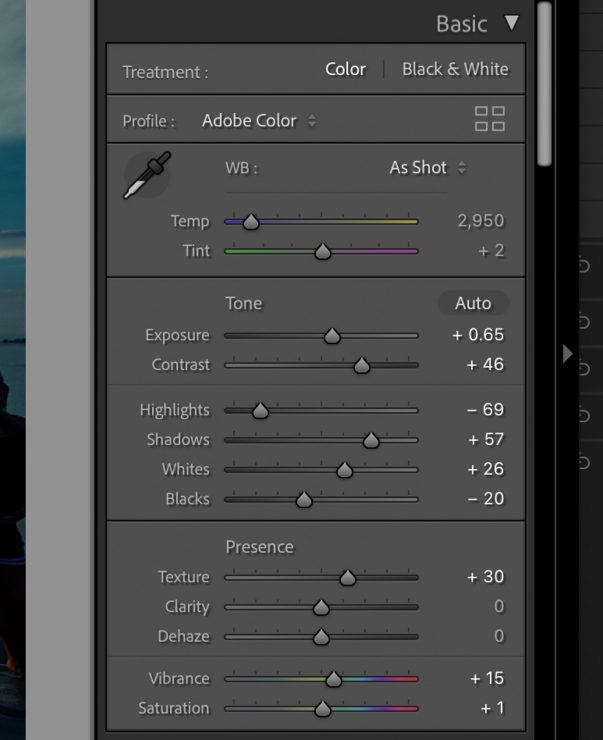
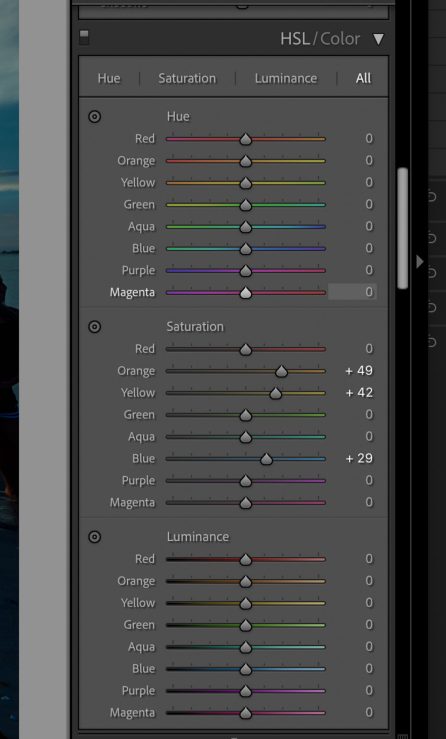
These are the adjustments I made in Lightroom Classic. Again, this is to taste, there is no “right” or “wrong.” Adjust to your liking.
.mgl-tiles { display: none; } #mgl-gallery-634eec9d1a224 { margin: -5px; width: calc(100% + 10px); } #mgl-gallery-634eec9d1a224 .mgl-box { padding: 5px; } @media screen and (max-width: 768px) { #mgl-gallery-634eec9d1a224 { margin: -5px; width: calc(100% + 10px); } #mgl-gallery-634eec9d1a224 .mgl-box { padding: 5px; } } @media screen and (max-width: 460px) { #mgl-gallery-634eec9d1a224 { margin: -5px; width: calc(100% + 10px); } #mgl-gallery-634eec9d1a224 .mgl-box { padding: 5px; } }
Now it’s your turn!
With a little bit of practice and trying the different modes before you know it you’ll be capturing epic sunset images as well. I’m sure you have other ways to capture a great sunset, these are just a few examples.
Share your experiences in the comments below or in the Photofocus Community.
Tell your story with the second annual Visual Storytelling Conference!
Experience four days of interactive, online training sessions featuring a range of educational content with experienced photographers and content creators. This free event kicks off with a series of technical boot camps to build essential skills, followed by live, online sessions on photography, video, business and social media. Join live from March 10-13, 2022!