
When I rediscovered film photography, among the wonders that I got quickly fascinated with was double exposures. Multiple exposures, even. It was something that I picked up from the Lomography community, mesmerized by all the fun results and creative possibilities promised by this technique.
It’s definitely a lot easier to create double and multiple exposures using a digital camera or your go-to photo editing software. Still, there’s something more rewarding and exciting with doing it the old school way. If you’re yet to try it but aren’t sure how or get started, these simple tips should be able to give you some ideas.

Plan your shoot ahead
As with any photography project, preparation is an important part of creating double exposures on film. You’ll be creating these shots in camera and you won’t be able to see the results until you’ve processed and scanned your roll. So, it pays to be well-prepared before you start shooting.
Pick a camera that you want to use for double exposures and find out if it has a built-in double/multiple exposure function. Take note of the location you want to shoot in and see if it has a variety of dark and bright scenes or subjects. Prepare a marker, a film picker and masking tape or anything that will let you label your film after shooting (more about these later).
Mark your film
If you want to keep your double exposures aligned on the same frame, you should mark the start of the roll before shooting the first pass. This especially applies if you’re using a camera without a multiple exposure function. Load your film as usual, then use a marker to line the start of the roll along the film spool’s mouth. This will let you know that you shouldn’t pull your film beyond this line when you reload the film for the second pass.
Underexpose your photos
When you’re shooting two or more overlapping frames, you will overexpose the resulting image if you shoot at the same exposure value (EV). To address this, you should underexpose both shots so when they are combined, you will still end up with a properly exposed image. This is easy if you’re using a camera that allows you to change the (EV) settings.
Eduardo Pavez Goye explains this technical detail simply and in his video above, so you know how many stops you need to underexpose depending on the number of exposures you want in a single frame.
.mgl-tiles { display: none; } #mgl-gallery-634ef6eea9209 { margin: -5px; width: calc(100% + 10px); } #mgl-gallery-634ef6eea9209 .mgl-box { padding: 5px; } @media screen and (max-width: 768px) { #mgl-gallery-634ef6eea9209 { margin: -5px; width: calc(100% + 10px); } #mgl-gallery-634ef6eea9209 .mgl-box { padding: 5px; } } @media screen and (max-width: 460px) { #mgl-gallery-634ef6eea9209 { margin: -5px; width: calc(100% + 10px); } #mgl-gallery-634ef6eea9209 .mgl-box { padding: 5px; } }
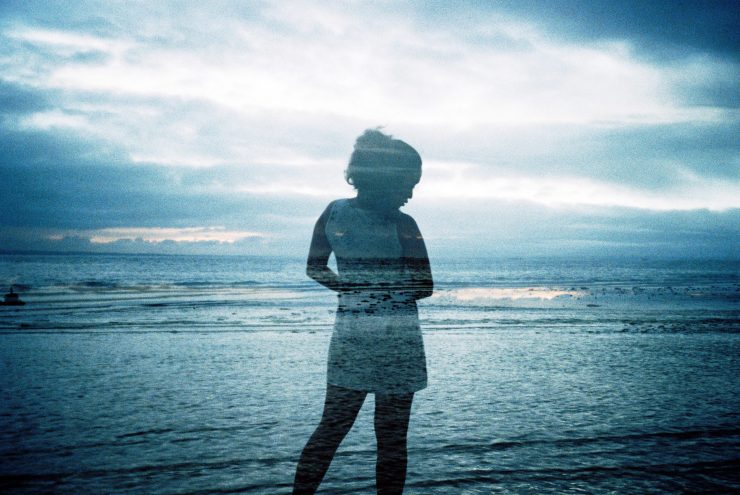
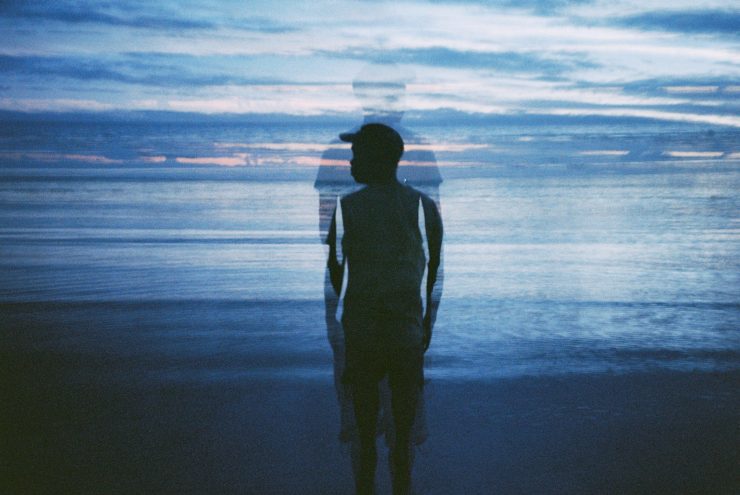
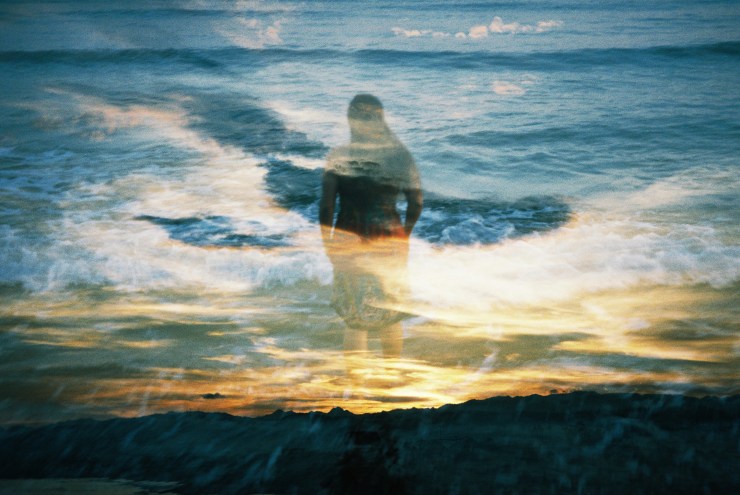
Pair silhouettes with patterns or textures
The best way to shoot double exposures is to combine bright and dark subjects. This way, the bright subjects show through the spots where the dark portions are. This is an application of another technical detail Goye mentioned in the detail above. Anything white or light-colored will destroy the information on the second exposure, while anything dark will retain the information.
One of the best ways to work with this is to pair silhouettes with patterns. Try pairing a silhouette portrait with foliage, a dark object with a stunning city skyline view or interesting shadows with captivating skies.
Use your film camera’s multiple exposure mode or lever
Some SLR and point-and-shoot cameras have an MX switch/lever/mode that you can use for double and multiple exposures. In some point-and-shoot cameras, this is indicated by an icon in the camera modes. Check your camera manual (or look for it online in websites like butkus.org) to help you locate this function.
Shoot your film roll in the same camera
If your camera doesn’t have built-in multiple exposure functionalities, you’ll have to reload your film in the same camera. This is where marking the film comes in handy. The advantage of this option is, you can shoot the individual layers separately.
For example, you may want to shoot all the dark subjects first if your location doesn’t have a lot of bright subjects.
Another advantage is that you can do this with any 35mm film camera. But make sure you have a film picker ready if your camera automatically rewinds the film all the way in (or you accidentally do it with manual rewind camera).
Or, you can also do the tip above by AwesomeCameras to manually prevent your camera from advancing the film while cocking the shutter. It’s a bit challenging to do if you’re a beginner, but with enough practice, you may be able to get the hang of it.
Do double exposures with fellow film photographers
One of the most fun things about doing double exposures on film is that you can do it with friends — wherever in the world they may be! This collaborative spirit is what makes doubles popular in experimental photography circles like the Lomography community. Even our very own Lauri Novak did a fun film swap project with a friend and shared her own double exposure tips here!
Don’t forget to share these tips with your friends so they know how they can create great results with you.
Final notes
You can do double exposures with any 35mm film camera, and any medium format camera that doesn’t require advancing to the next frame to engage the shutter. You can’t really reload 120 film as you would with a 35mm roll, since it’s difficult to respool the film so it loads and starts the same way. I’ve heard of some photographers doing it., but I think it’s just too much work. If you want to take film double exposures a notch higher, some Polaroid and Instax cameras also have MX functions that let you get extra creative with instant photography.
Got some film double exposure tips that I missed? Drop them in the comments below or share then in the Film Photography group of the Photofocus Community!
Tell your story with the second annual Visual Storytelling Conference!
Experience four days of interactive, online training sessions featuring a range of educational content with experienced photographers and content creators. This free event kicks off with a series of technical boot camps to build essential skills, followed by live, online sessions on photography, video, business and social media. Join live from March 10-13, 2022!