We don’t get a lot of snow here in Sedona, AZ. When it falls with accumulation, it’s an event. My having made mistakes in the past can help you in the future. To use a couple Disney characters, keep your snow from turning into “Drizella” and make it “Snow White.”
Snow capture
Ever had your snow images come out dingy and gray? Me too. If you depend upon your in-camera meter for exposure there is part of your problem. The camera’s meter is designed to give an overall exposure of 18% gray. With all of the white in the scene the metering renders it gray. I’ve found it a bit difficult to get those grays to come back to white in post. The solution is to take control of the exposure.
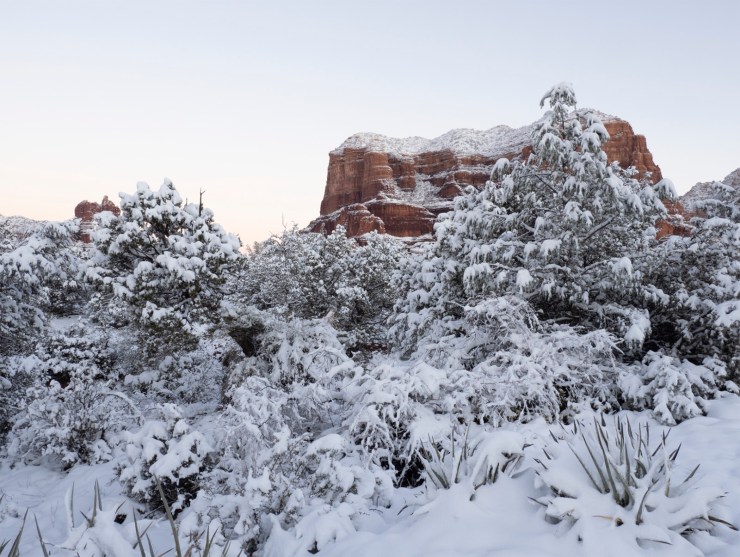
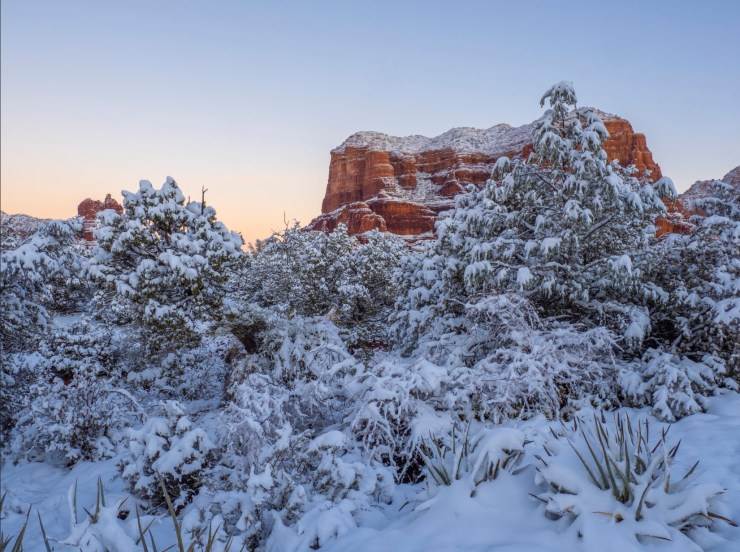
I often photograph in Aperture priority mode. With that in mind and knowing that the camera will render snow scenes gray, I need to correct the exposure.
Adding 1-1/3 to 2 stops of exposure compensation will render the snow correctly. Exactly how much exposure compensation is needed will depend upon what else is in the scene. If there are some dark areas mixed in, you will need less. If it is totally snow in the frame, exposure will need to be increased. Sara Kempner also shares some ideas on photographing snow.
Add a histogram
Lastly, you don’t want to totally overexpose the scene and loose all detail. If your camera has the ability to show a histogram of the scene fire it up. I use a histogram to ensure that I don’t add too much compensation and blow out information in the highlights. Snow needs some detail rendered to be convincing in your photograph.
.mgl-tiles { display: none; } #mgl-gallery-634ef948dc873 { margin: -5px; width: calc(100% + 10px); } #mgl-gallery-634ef948dc873 .mgl-box { padding: 5px; } @media screen and (max-width: 768px) { #mgl-gallery-634ef948dc873 { margin: -5px; width: calc(100% + 10px); } #mgl-gallery-634ef948dc873 .mgl-box { padding: 5px; } } @media screen and (max-width: 460px) { #mgl-gallery-634ef948dc873 { margin: -5px; width: calc(100% + 10px); } #mgl-gallery-634ef948dc873 .mgl-box { padding: 5px; } }
Even though detail is not lost to the shadows this I consider this histogram to be underexposed for the scene.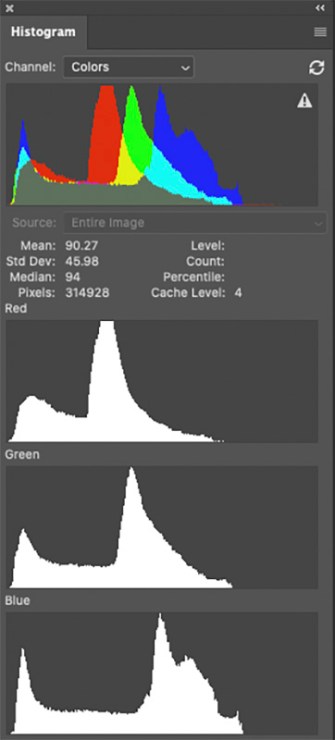
I call this exposure ‘just right’ as it is exposed to the right, ETTR, without losing much detail.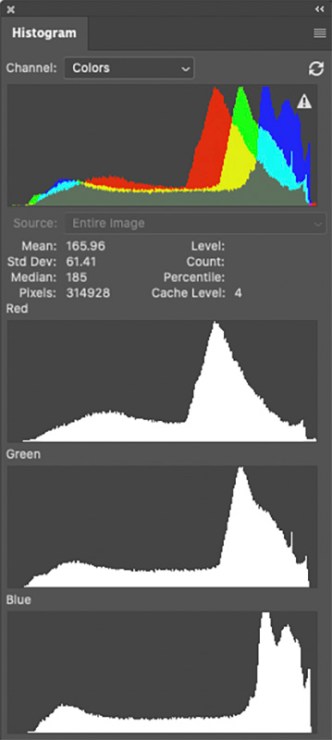
This histogram shows overexposure that loses detail in all three channels. Too much.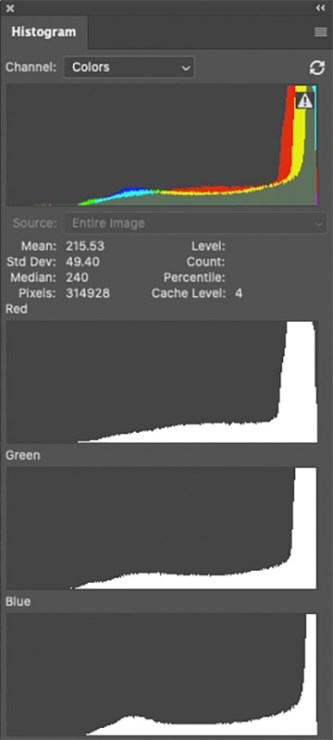
If there is a lot of information piled up on the right side of your histogram, you’ve gone too far. If you are right up to the right side and losing just a bit of information, you are good.
Remember, the histogram on your camera is showing you a picture of the JPEG the camera is creating. Shooting in RAW gives you more head room to recover highlights you would have lost in shooting a JPEG.
Post production
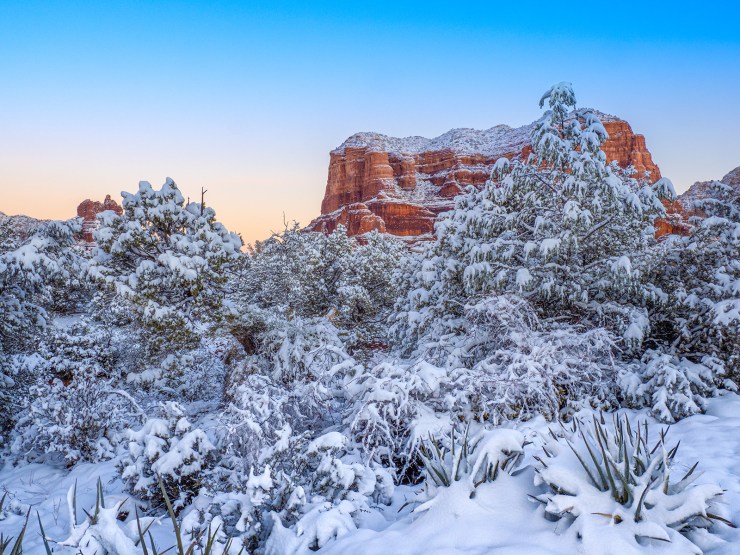
I almost always shoot in RAW format to get the most information possible. This requires some post processing to finish the job. Adobe Camera Raw is my choice, but the interface is similar in Lightroom.
Here the highlights have been brought down and shadows opened up. Gradients have been applied to lower the exposure in the sky. Saturation and Vibrance were added to finish off the processing before opening the file in Photoshop. An additional Soft Light Layer was used to do additional dodging and burning.
You can see how I use Adobe Camera Raw gradients to control shadows and highlights by checking out this article.
Yours in Creative Photography, Bob
Tell your story with the second annual Visual Storytelling Conference!
Experience four days of interactive, online training sessions featuring a range of educational content with experienced photographers and content creators. This free event kicks off with a series of technical boot camps to build essential skills, followed by live, online sessions on photography, video, business and social media. Join live from March 10-13, 2022!
