When it comes to third-party batteries, I usually give a thumbs up. But there’s a few things to consider along with some care and feeding instruction, that has worked well for me in keeping my batteries happy.
Not all batteries are created equal. It’s important to make sure you research your camera manufacturer’s warranty, too. Using a third-party battery could potentially void it. Once you’re good to go, check out the tips below when looking at third-party options.
Price
Probably one of the major differences between OEM batteries and third-party is money. A quick peek at current pricing as of November shows these differences for batteries with which I am familiar:
- Panasonic for the GHX cameras and G9 cameras
- OEM: $59.99
- Third-party Wasabi batteries: $12.99. You can also get kits with two Wasabi batteries and a charger for about $25.
- Olympus for the OM-D E-M1 Mark III
- OEM BLH-1: $54
- Third-party Wasabi replacement two-pack with charger: $55.99 (note that these batteries are not decoded, meaning your camera will not report remaining battery life)
- Bescor BLH1 Battery and Charger Kit: $39.50
Quality
There is no doubt about it — OEM batteries are manufactured to tighter standards and will give you best results. You have higher quality and performance. If you are a pro and depend upon your batteries for your job and need to not be swapping out your batteries in the middle of a job, OEM is absolutely for you.
On the other hand if you are a novice, advanced amateur or just out mucking about and can change batteries, the trade off of a little less performance can be good.
While we are talking about quality, please be aware that should any battery ever swell and feel a little hard putting into your camera, DO NOT USE IT. I also highly recommend not leaving non-OEM batteries in the camera for any extended length of time.
Care of batteries

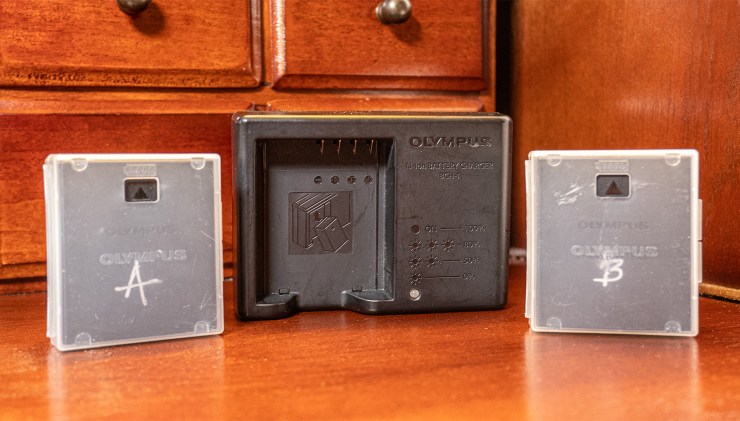
I’ll throw in some notes on caring for whatever batteries you have. The Olympus battery box comes with a small cutout on the container. The battery has an arrow embossed that can show through the window. Line the arrow up when your battery is charged and flip the battery over when it is spent.
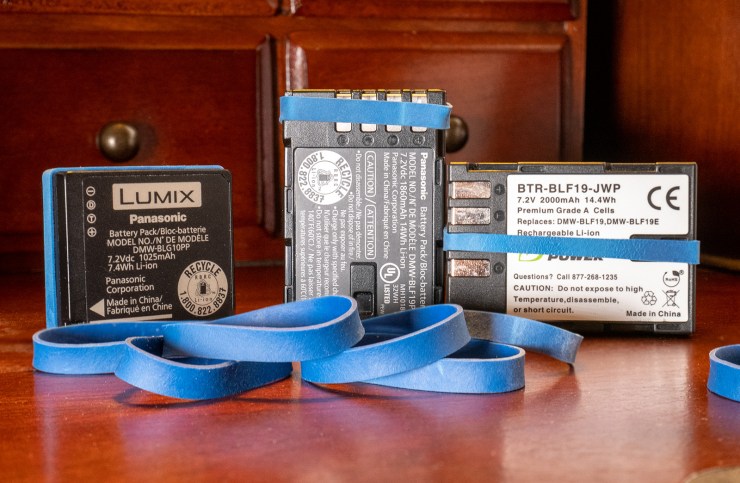
If you have lost or never had your protective battery container, you will want to protect the battery contacts. I found a simple solution. I bought a box of short, wide rubber bands. This keeps the contacts from connecting with any other metal in your kit. I also use it as an indicator if a battery is charged. If the rubber band is across the contacts it is charged. If it is vertical the battery is spent. There’s not much worse than thinking your battery is ready to go and it is lacking juice. That can put a real crimp in your shooting day.
Labeling

I label batteries — A, B, C or 1, 2, 3. This keeps the batteries in rotation. When A is done, B powers the camera. A heads to the charger immediately when I get back to the studio.
I make it a practice to have at least three batteries for each camera. One in the camera and two backups. When traveling I can have one in the camera, one backup and one on the charger so I’m never without juice.
Final thoughts
For cameras that I use sporadically or out shooting for fun I have third party batteries and keep a few in my bag. For my Olympus OM-D E-M1 Mark III which I use in my professional shoots, all batteries are OEM. I had tried to order a third-party battery and it did not work. It was dead from the beginning, and I had to pay shipping to the vendor to get my money returned. And I still had to order the OEM batteries.
Your mileage may vary.
Yours in Creative Photography, Bob
Tell your story with the second annual Visual Storytelling Conference!
Experience four days of interactive, online training sessions featuring a range of educational content with experienced photographers and content creators. This free event kicks off with a series of technical boot camps to build essential skills, followed by live, online sessions on photography, video, business and social media. Join live from March 10-13, 2022!
