
Recently, I had a photographer friend stay for a few days. While we did have several days of great weather and we were out and about, we had one truly horrible day. It was so miserable that we opted not to go out, but spend a few hours being creative in the studio with some dry ice.
So don’t let the weather bring you down. Make the most of the dreary weather and have an indoor photography adventure with friends.
Grab some dry ice

You may have to do a bit of a search on the internet, but I am pretty sure dry ice is pretty easy to obtain in most areas. It’s fairly cheap, it just needs a little care during handling and storage. I have a cheap plastic cooler and a pair of BBQ tongs specifically for dry ice. I purchased 2 kg of dry ice pellets, which might seem like a lot, but when you consider 1 kg is roughly a large handful, 2 kg isn’t that much. However, a little goes a long way. Just be careful NOT to let the dry ice touch your skin, as it can burn. Tongs or gloves are the way to go when handling the dry ice.
Set the scene
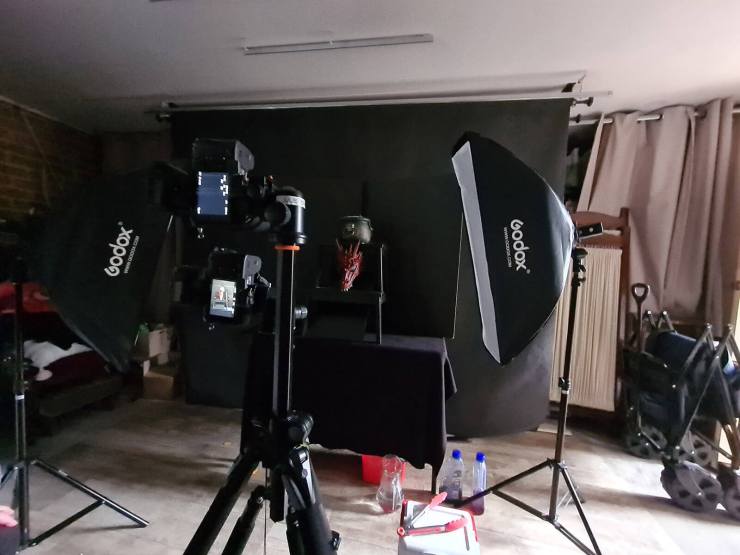
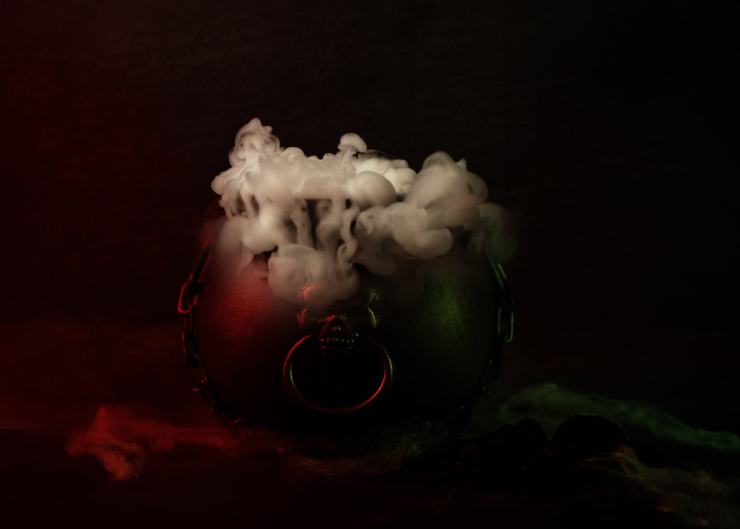
We set our scene up on a table, using two Godox AD200 with strip boxes to give a soft, diffused light to the scene. As it is October, we decided to go for some spooky Halloween looks. Perfect for dry ice, right? Witches, cauldrons, spooky masks, jack-o-lanterns and such. We found that placing black jersey fabric on the table ‘grabbed’ the fog and made it linger longer than without it.
How best to use dry ice?

Once your scene is set and your camera focused, it’s time to capture the action. I found that using hot water created more fog when you dropped the dry ice into it with tongs. Never touch the dry ice with your fingers. I dropped a few dry ice pellets into a glass or ceramic bowl 3/4 filled with hot water. It will fizzle and pop and make lots of wonderful fog. In the martini glass, we also added some food coloring to the water (I think we could have added more).
Camera gear
.mgl-tiles { display: none; } #mgl-gallery-6356993b36907 { margin: -5px; width: calc(100% + 10px); } #mgl-gallery-6356993b36907 .mgl-box { padding: 5px; } @media screen and (max-width: 768px) { #mgl-gallery-6356993b36907 { margin: -5px; width: calc(100% + 10px); } #mgl-gallery-6356993b36907 .mgl-box { padding: 5px; } } @media screen and (max-width: 460px) { #mgl-gallery-6356993b36907 { margin: -5px; width: calc(100% + 10px); } #mgl-gallery-6356993b36907 .mgl-box { padding: 5px; } }
Spooky Halloween fun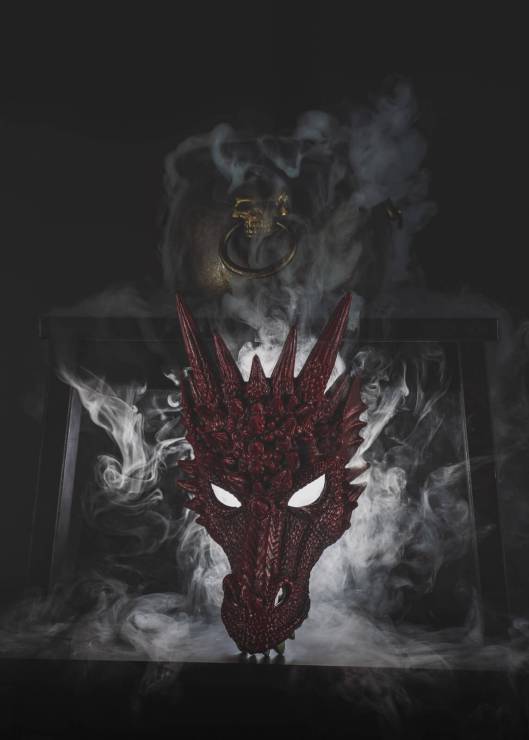
Add a little Photoshop magic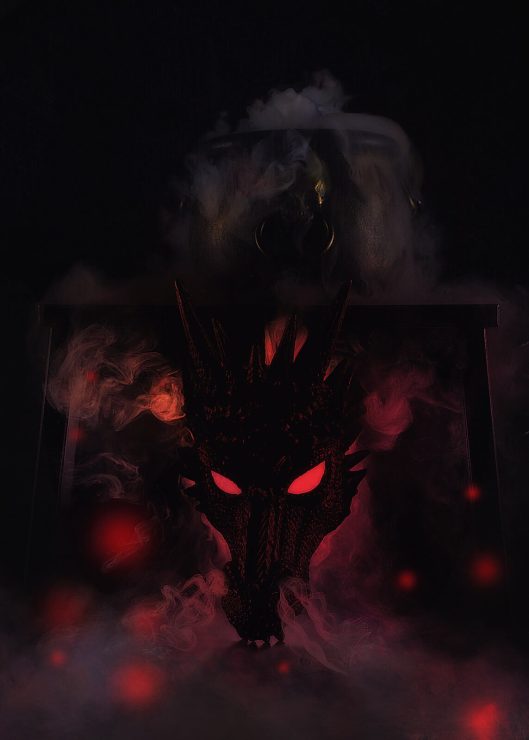
Apart from my Godox speedlights (1/32 power), I also used a Godox X1 trigger on my Sony a7R III. I used my Tamron 28-75mm lens at f/3.5 – f/5.0. Just to free our hands up for placing the dry ice, we popped our cameras on tripods to make things easier. Consider adding gels or playing with different light sources to get really creative.
Clean up
Generally, you can only use a small bowl of water once, as the dry ice cools it down super quick. We used a mix of ceramic and glass bowls. Even inside the cauldron, it was just easier to handle. Once cool, the dry ice is not as effective. When the dry ice has dissolved and the fog is gone, you can dispose of the water and start again. We had a bucket on hand to pour the used water into. We also had a jug of hot water handy to top up our bowls for each shot. Both can be poured onto the garden when done. The dry ice only lasts a few hours, so there is nothing to clean up when it all dissipates. It’s best to shoot on the day you collected it. The ice will last 1-2 minutes depending on how much you add and the amount of water you use. You may need to experiment a bit at first.
Best with friends
Now you can do this on your own, but for me, it is time well spent with photography friends. Get creative and explore different setups and settings. It doesn’t have to be spooky, but that can be lots of fun too.
Check out the little behind-the-scenes video I captured on my mobile phone. Bubble bubble, boil and trouble!
Tell your story with the second annual Visual Storytelling Conference!
Experience four days of interactive, online training sessions featuring a range of educational content with experienced photographers and content creators. This free event kicks off with a series of technical boot camps to build essential skills, followed by live, online sessions on photography, video, business and social media. Join live from March 10-13, 2022!