
Many times, you are photographing a scene and it’s overrun by people! If you want to show the area sans folks, what do you do? Think ahead and shoot for a Median Stack in Photoshop.
How to shoot
Although you can handhold to make images for this technique, locking down your camera is ideal. You make a number of images and allow Photoshop to remove all the moving pieces leaving behind the subject of your photo.
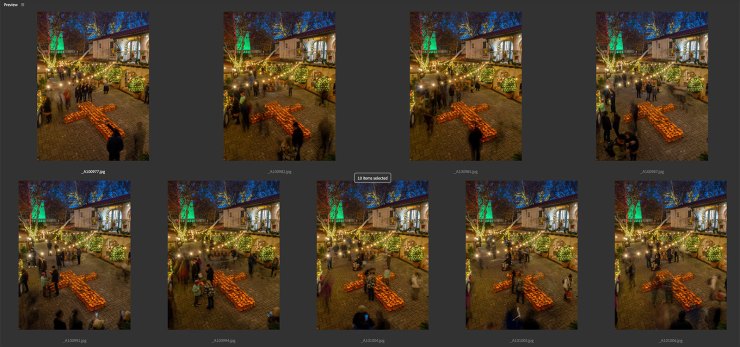
One way to create the images is to make interval captures. If you do it this way you will also be able to create a time lapse of the scene. A time lapse tells the story different than a single still frame can.
When making your image captures try to envision that all areas are uncovered at one time or another. If there is a constant person who does not move they will be considered part of the landscape and be rendered into the final image. If you have a little bit of foot traffic you can photograph and shoot only when areas are uncovered. You’ll need less images and processing time and file size will be less.
Photoshop processing
Photograph in RAW in order to make an overall correction in Adobe Camera Raw or Lightroom to your images. Once completed images are output to a folder as jpeg files.
Go to Photoshop File > Scripts > Load Files into Stack. In the resulting dialog box select the folder of your images. If you were hand-holding the camera check the “Attempt to Align Source Images.” If you used a tripod don’t check this box as it will add unnecessary processing time. Check the “Create Smart Object” after “Loading Layers.” Click OK.
When the Smart Object has been created go to Layers > Smart Objects > Stack Mode > Median. When it has finished processing, voila! The people are gone. Magic! Before moving on “Rasterize” your Smart Object to lower your file size. I used approximately 100 images and in trying to save the files it was over two gigabytes and could only be saved as a PSB. Once the conversion was done, rasterizing the file moved it back to around 57MB. Much more manageable.
Final photo
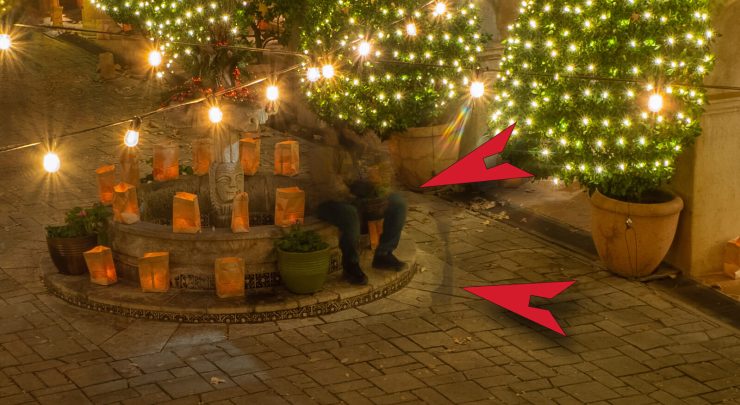
The final photo needed a little massaging. The area in front of the cart selling hot drinks had people there most of the time so there was a little ghosting. I cleaned that up with a little burning using a Soft Light layer and some cloning with the Rubber Stamp Tool. Overall, Photoshop and the Median Stack Mode did almost all of the heavy lifting in clearing the area of people.
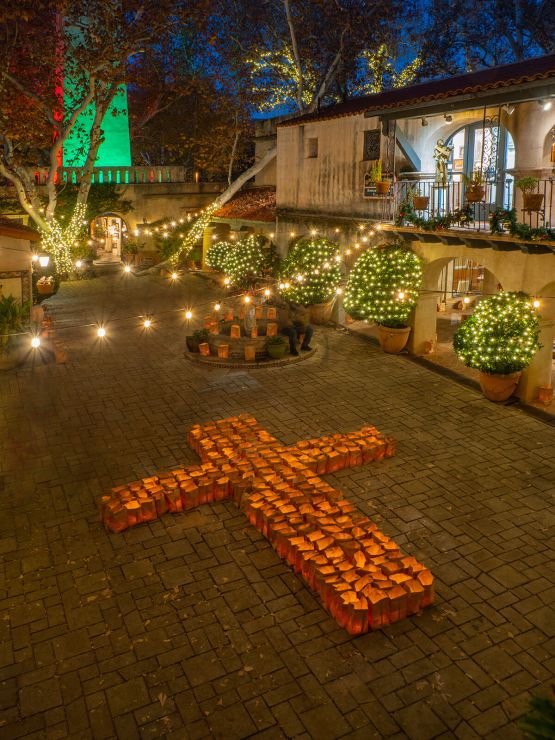
A little pre-planning and some post production made capturing the final image fairly easy. Coming up, I’ll show you the time lapse video created using these same images.
Yours in Creative Photography, Bob
Tell your story with the second annual Visual Storytelling Conference!
Experience four days of interactive, online training sessions featuring a range of educational content with experienced photographers and content creators. This free event kicks off with a series of technical boot camps to build essential skills, followed by live, online sessions on photography, video, business and social media. Join live from March 10-13, 2022!