High-end hotels want what I call super beauty images. That means in addition to having a solid composition that tells the story of the room, it also has to be retouched beautifully … and fully! Here’s the story of one image at a newly re-branded property here in Sedona.
The hotel
Formerly the Sedona Rouge Hotel and Spa is now The Wilde Resort and Spa. I think they’ve got a winner targeting a young, active market. They needed to get an image of one of their suite rooms for announcements, marketing and news releases. And they needed it quick.
Working the room … literally
Randy the marketing director of the property was a great guy with which to work. The Olympus OM-D E-M1 Mark III is my main camera, and I tried using the Olympus M.Zukio 12-100mm f/4.0 PRO lens. Ultimately with the story they were trying to tell, though, I needed to be just a bit wider. The Olympus M.Zukio 7-14mm f/2.8 PRO lens came to the rescue, giving me a wide enough field of view with no distortion.
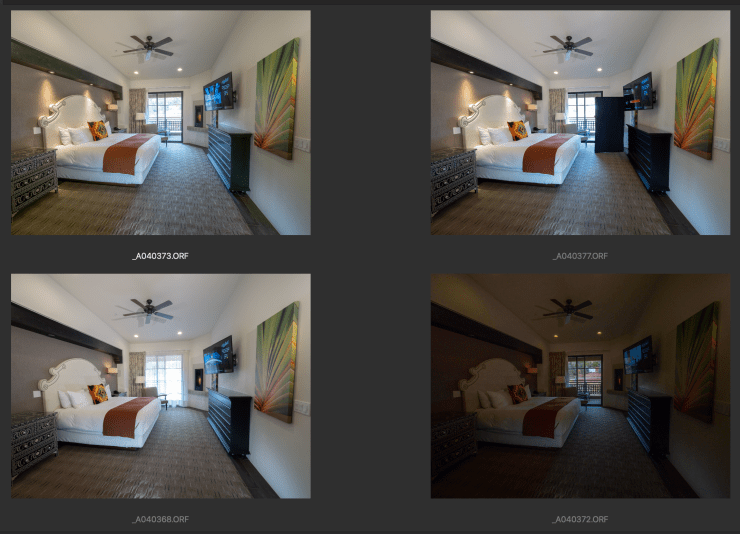
Because the density range is so great in a room and also needed to render outdoors, only so much can be done with additional lighting. With my camera mounted on a tripod, multiple images were made for each lighting need by changing the shutter speed. I kept my aperture the same, as doing otherwise meant that my images might not line up appropriately when blended together.
Photos were taken with the sheers closed and open. A black cloth panel was used in one image to keep glare off the TV screen and furniture underneath. Specular highlights and glare can destroy color in a reflective surfaces.

With Olympus Capture software, I was able to easily tether to my computer. Tethering makes the job much easier. A larger screen makes decisions about camera placement and composition viewable by all. Small imperfections and details can be handled before the final shot is made. Previous approval of camera angles saves reshoots!
Post-production of the images
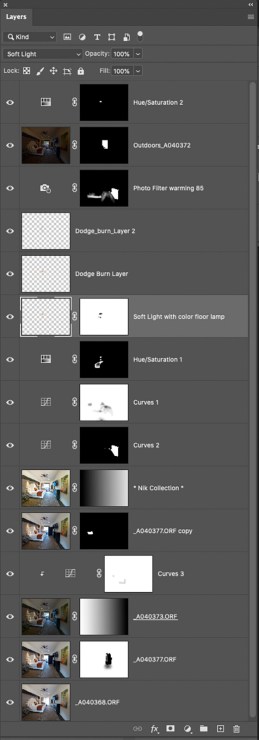
Each image was tweaked, pulling highlights down and shadows up as needed in Adobe Camera Raw (ACR). The lightly processed images were selected in Adobe Bridge, using the Photoshop menu item Load Images into Layers so I could combine them.
Overall scene lighting image anchors the Layer stack. Each darker exposure is up a level. The darkest layer was placed on top as that is the smallest piece I use for the window view. Light and shadows are placed in the final image and accomplished using masks.
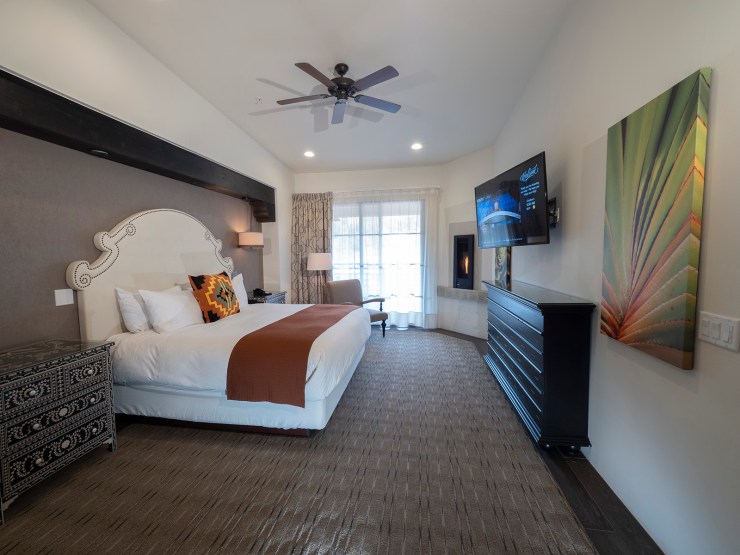
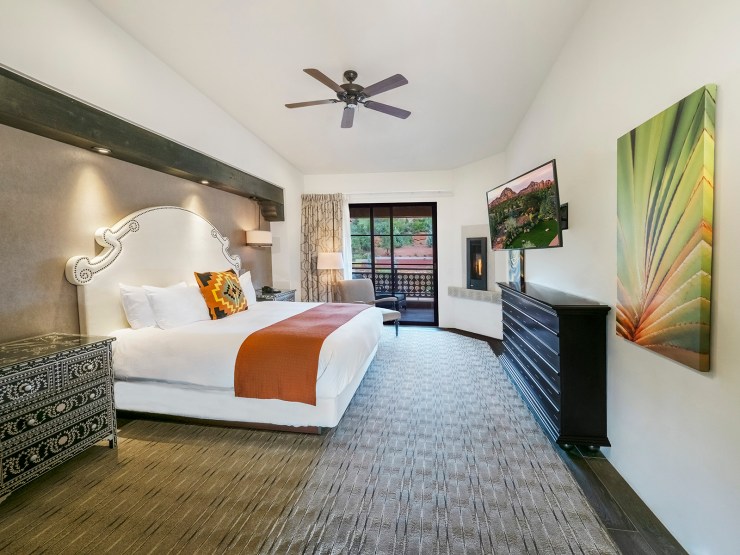
Extra post-production is needed to attain a pristine image. Wall plates, ceiling lights, lamp wires, shadows and any distracting elements not directly related to the décor and ambience of the room are removed. This includes shadows and bumps on the sheets and pillow cases. An image was added to the television screen. Here’s a before and after view of the suite:


The final manipulation is a Transform to straighten horizontal and vertical lines using the Skew setting in the Transform tool.
Yours in Creative Photography, Bob
Tell your story with the second annual Visual Storytelling Conference!
Experience four days of interactive, online training sessions featuring a range of educational content with experienced photographers and content creators. This free event kicks off with a series of technical boot camps to build essential skills, followed by live, online sessions on photography, video, business and social media. Join live from March 10-13, 2022!
