If you want to get serious about shooting calculated photoshoots, get yourself off Auto White Balance!
The camera usually does a great job at analyzing the lighting scenario and chooses a suitable color temperature when it is set to AWB. The problem is that setting it to auto lets the camera adjust the white balance ever so slightly for every single image, reducing consistency if you’re sending out a batch of pictures from one specific location. Varying factors, such as color of clothing or reflected sunlight, are the prime suspects for the cause of this.

Consistency might not seem super important, but if you’ve got a lot of images in the same location and they’re all varying slightly, you might spend a little bit more time post-processing all those images to line up.
I’ve noticed that even after I’ve synced settings in Lightroom with RAW photos, the colors still may vary slightly. I’d say that the best times to really set a defined white balance is in the studio, using flash or a condition with a mixed lighting scenario and you’re not changing to different locations.
I’ve got nothing against AWB when it comes to shooting for fun, on the street or during situations that aren’t calculated.

How to fine-tune your white balance
There are times with constant or available light where you might night know which white balance setting to set your camera to. There are tools to help you create a custom white balance for accurate results, such as the ExpoDisc and ColorChecker Passport.
But want to know my quick fix? If your camera is capable, switch it to live view, then adjust the white balance to some of the presets. Some cameras will even allow you to select a color temperature instead of a preset while you’re in live view. You typically will be able to visually see what preset will look like so you can match the scene. Although it isn’t perfect, it’s getting you something consistent and simple to work with in post-processing.
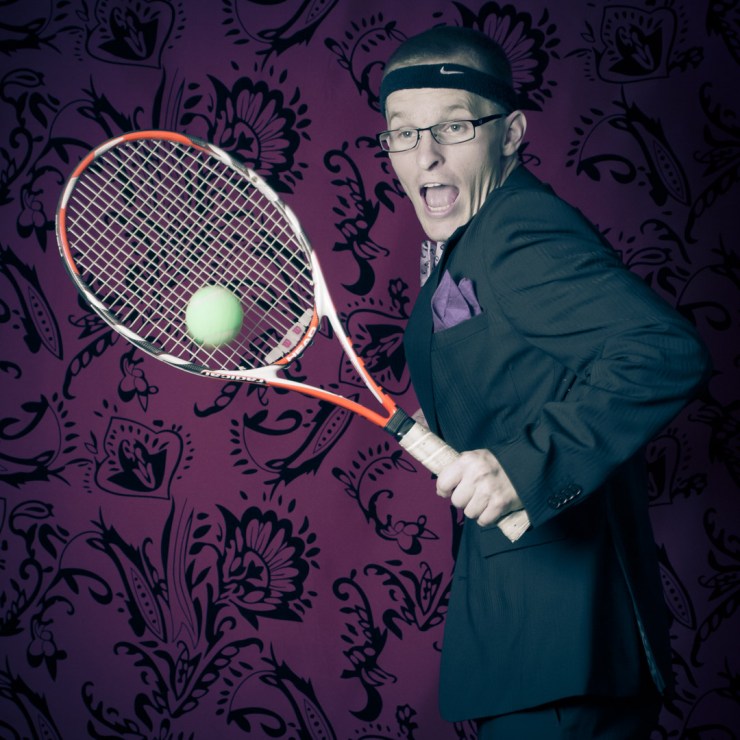
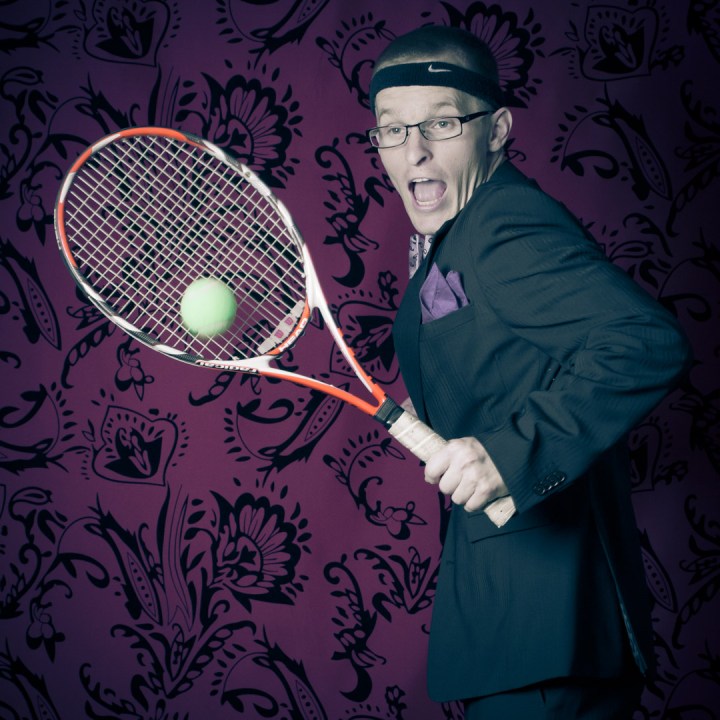
The preceding two images were shot at the same time with a studio strobe only seconds after each other, yet the white balance is off by a few points on both sliders. You probably won’t be able to tell when they’re separated, but if you see them side-by-side, you’ll see the difference.
.mgl-masonry { display: none; } #mgl-gallery-634ef1161cd2e { column-count: 2; margin: -5px; } #mgl-gallery-634ef1161cd2e .mgl-item { padding: 5px; } #mgl-gallery-634ef1161cd2e figcaption { padding: 5px; } @media screen and (max-width: 800px) { #mgl-gallery-634ef1161cd2e { column-count: 2; } } @media screen and (max-width: 600px) { #mgl-gallery-634ef1161cd2e { column-count: 1; } }


It’s just a small little tip for the those who really care about details 🙂
Tell your story with the second annual Visual Storytelling Conference!
Experience four days of interactive, online training sessions featuring a range of educational content with experienced photographers and content creators. This free event kicks off with a series of technical boot camps to build essential skills, followed by live, online sessions on photography, video, business and social media. Join live from March 10-13, 2022!
