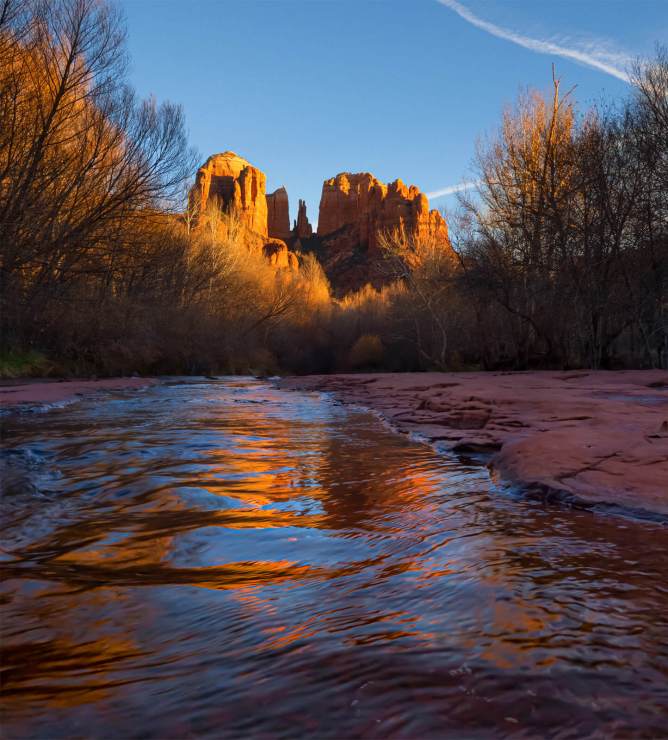
Landscape photography can throw some curves at you for proper exposure. This is especially if you work in a less than flat land situation. Mountains, hills and ridges can present a wide exposure situation when the sun ducks behind yet still lights the main subject.
My hometown of Sedona in Arizona presents this problem all the time. There are gorgeous red-rock formations that remain lit while the area in front is in shadow. If you want to shoot landscape photography during that time you need to deal with a density that is more than most cameras can record in one image. What to do?

Exposure bracketing
Exposure bracketing — capturing multiple exposures of the scene — is the answer. You can blend one or more exposures together to have good quality pixels with which to work to make your photo. If you were to work from a single image where the density is right for the sky the foreground would be underexposed. Opening up the shadows would lead to increasing noise. One quick tip when making your exposures is to use aperture priority. This will force the shutter speed to change. If you are in shutter priority the aperture will change and that results in the images not blending together properly as the image will have a slightly different size in each capture. It also is helpful to have the camera supported with a tripod.

Post processing
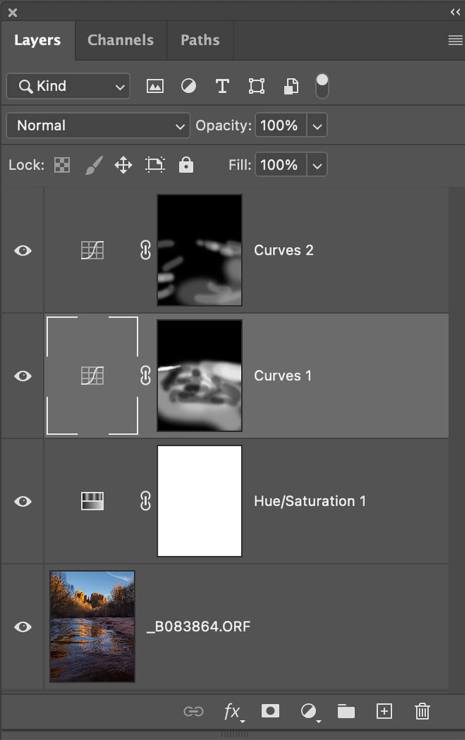
Once you have downloaded your images view them with each area of lighting in mind. In this case one image was chosen for the highlights and one for the shadows. If the density range was deeper I would have chosen to use more exposures and start with processing the scene to HDR. The two images are processed separately then stacked as layers in Photoshop. Using masks and adjustment layers the two are blended together and enhanced. You can see the layers after the two exposure were blended together.

Capture and gear

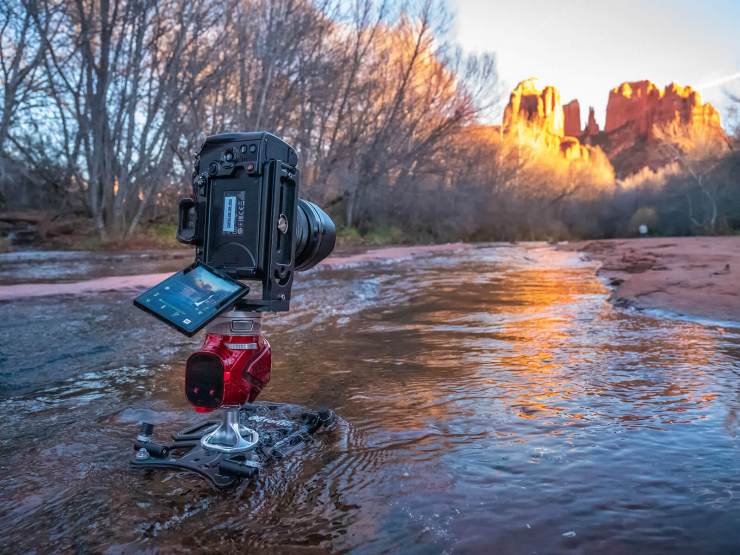
In this case I wanted a solid reflection of the red rocks in the water. This was made easier by getting the camera low and in the moving water. The Platypod Elite and eXtreme were the support I needed for my Olympus E-M1 Mark III with a 7-14mm f/2.8 Pro M. Zuiko lens.
FYI, I am a Platypod Ambassador with gear supplied, but I love the stuff!
Yours in Creative Photography, Bob
Tell your story with the second annual Visual Storytelling Conference!
Experience four days of interactive, online training sessions featuring a range of educational content with experienced photographers and content creators. This free event kicks off with a series of technical boot camps to build essential skills, followed by live, online sessions on photography, video, business and social media. Join live from March 10-13, 2022!
